 ADA compliance rules for websites have been around for a long time, but it still seems us WordPress website owners are just catching on.
I know too, as just two years ago I was totally in the dark before learning all that I’ll show you below.
Noncompliance harms our disabled users, which is bad enough, but another threat is when lawyers are more aware of your website’s compliance flaws that you are.
For example, my friend’s outdoor event website got sued by a blind activist’s community for nearly $1.5 million, which is obviously crippling for a blogger or web designer.
When his firm hired me fix his website’s, and we spent nearly 9 months changing his theme, rebuilding everything, and running several tests I’ll explain below, I figured it was time to write it all down in an ADA compliance WordPress guide for you guys to replicate if needed.
If your site is uncompliant right now, there’s no sense in waiting to fix things, and I’ve made all this very straight-forward so let’s dive right in.
Quick note: This article is NOT legal advice and you should not rely on this article for legal concerns. This is simply how I have gone about making my websites and my client’s sites successfully pass ADA/WCAG compliance tests in the past. However, make sure to consult a legal professional to confirm you’ve done everything correctly per your business’ own unique needs.
Contents
- Are you running WordPress? How to set up WordPress easily in under 1 hour.
- Definition of ADA and WCAG Compliance
- Step 1 – Check your theme
- Step 2 – Run the tests
- Step 3 – Fix the errors
- Step 4 – Prove your results
Are you running WordPress?
WordPress websites are the easiest to make compliant because they are built in logical files you can edit any time you want to pass a compliance test.
With WordPress, you get a fully coded website for dirt cheap out of the box that would cost you over $5000 from a local developer, and to edit it, you just login to a beautiful front end. A WordPress website has the best chance to succeed here, way better than a site built off HTML and CSS from scratch.
Note #1: When we say “WordPress”, we always mean WordPress.org, the full version run by over 35% of the Web’s top 10 million websites. We DO NOT mean WordPress.com, the limited free blogging software where you can’t edit the code. This blog runs on WordPress.org.
If you still need WordPress or are in the dark about how to setup WordPress or maybe have been putting it off, you can install it easily at Bluehost (where I’m a customer too!) You’ll just need to choose a domain name, or use your old one that’s fine, and then register some web hosting, then login and install WordPress and you’re set to create the content.
Normally a domain name costs you $15/yr and web hosting costs $10/mo, which is a lot for a small business especially if you’re new to all this.
However, Bluehost has agreed to offer DearBlogger users a promotional deal so you can get a FREE domain name and the hosting at 50% off. That’ll bring your costs of running a website WAY down – it’ll cost you about the cost of a cup of coffee per month.
Once you setup a domain, hosting and install WordPress you can install the ADA compliant theme we look at in Step 1 below and you’ll have done most of the work already.
How to setup WordPress easily
You can view our Step-by-Step Written Guide to Install WordPress here or our Step-by-Step Video Guide to Install WordPress here.
Let me know any questions – we specialize in helping people with this crucial starting step of setting up WP!
Note #2: You can still make a non-WordPress website (like an HTML website) compliant following the below steps.
Definition of Compliance
Most Internet accessibility laws came from the Rehabilitation Act of 1973, which was amended to Section 508 regulations, which will probably be amended again. If you Google definition of ADA (which stands for Americans with Disabilities Act) compliance you’ll find this result from InteractiveAccessbility.com
“The Department is currently developing regulations specifically addressing the accessibility of goods and services offered via the web by entities covered by the ADA. The fact that the regulatory process is not yet complete in no way indicates that web services are not already covered by title III.”
— Statement of Interest of the United States Department of Justice in NAD v. Netflix (page 10)
What the heck does this mean for us? Well just like most government projects involving the Internet, it’s a work in progress.
However, that doesn’t mean you can sit back, because this whole big set of rules affects Americans with disabilities, private employers with 15+ employees, state and local gov agencies, and businesses operating for the benefit of the public (that last one is you!)
So how do we comply? The website also says:
Organizations are encouraged to use the WCAG 2.0 level AA guidelines as a guide on how to become accessible until the DOJ defines the regulations.
So ADA is the act, and WCAG (now 2.0) is the set of rules. With a few more clicks you can find how to meet WCAG 2.0.
So you know the definitions, and have the rules you need to meet, so you’re good to go right? Not exactly. Because just like most government projects involving the Internet, the read really great on paper, but are difficult to put into practice.
That’s where this guide comes in – in the below steps we’ll break down the rules and look at actually steps within WordPress to make your website ADA and WCAGS 2.0 compliance, based on site’s I’ve built.
One important note: Compliance is an ongoing process. You can make a website compliant then let your team add content for a year and it can fall out of compliance. The good news is were are not going for 100% here, just fixing as much as we can. What we want is a compliance content manager (you) who knows the standards, makes good content and runs good tests each month. This will help you pass a compliance review.
Step 1 – Check your theme
Most WordPress themes are not ADA compliant the moment you install them.
Add all the content and crazy edits you’ve made at 2am, and you can have a real mess when it comes to responsiveness, let alone being compliant.
Is your current theme an ADA compliant WordPress theme? If YES, post a comment saying YES and your theme name. If not, post a comment saying NO and why you don’t think your theme is compliant.
If only there were a WordPress theme that was known for being ADA compliant out of the box…oh wait, there is. Divi Theme by Elegant themes is known for being much more ADA and WCAG compliant than most themes.
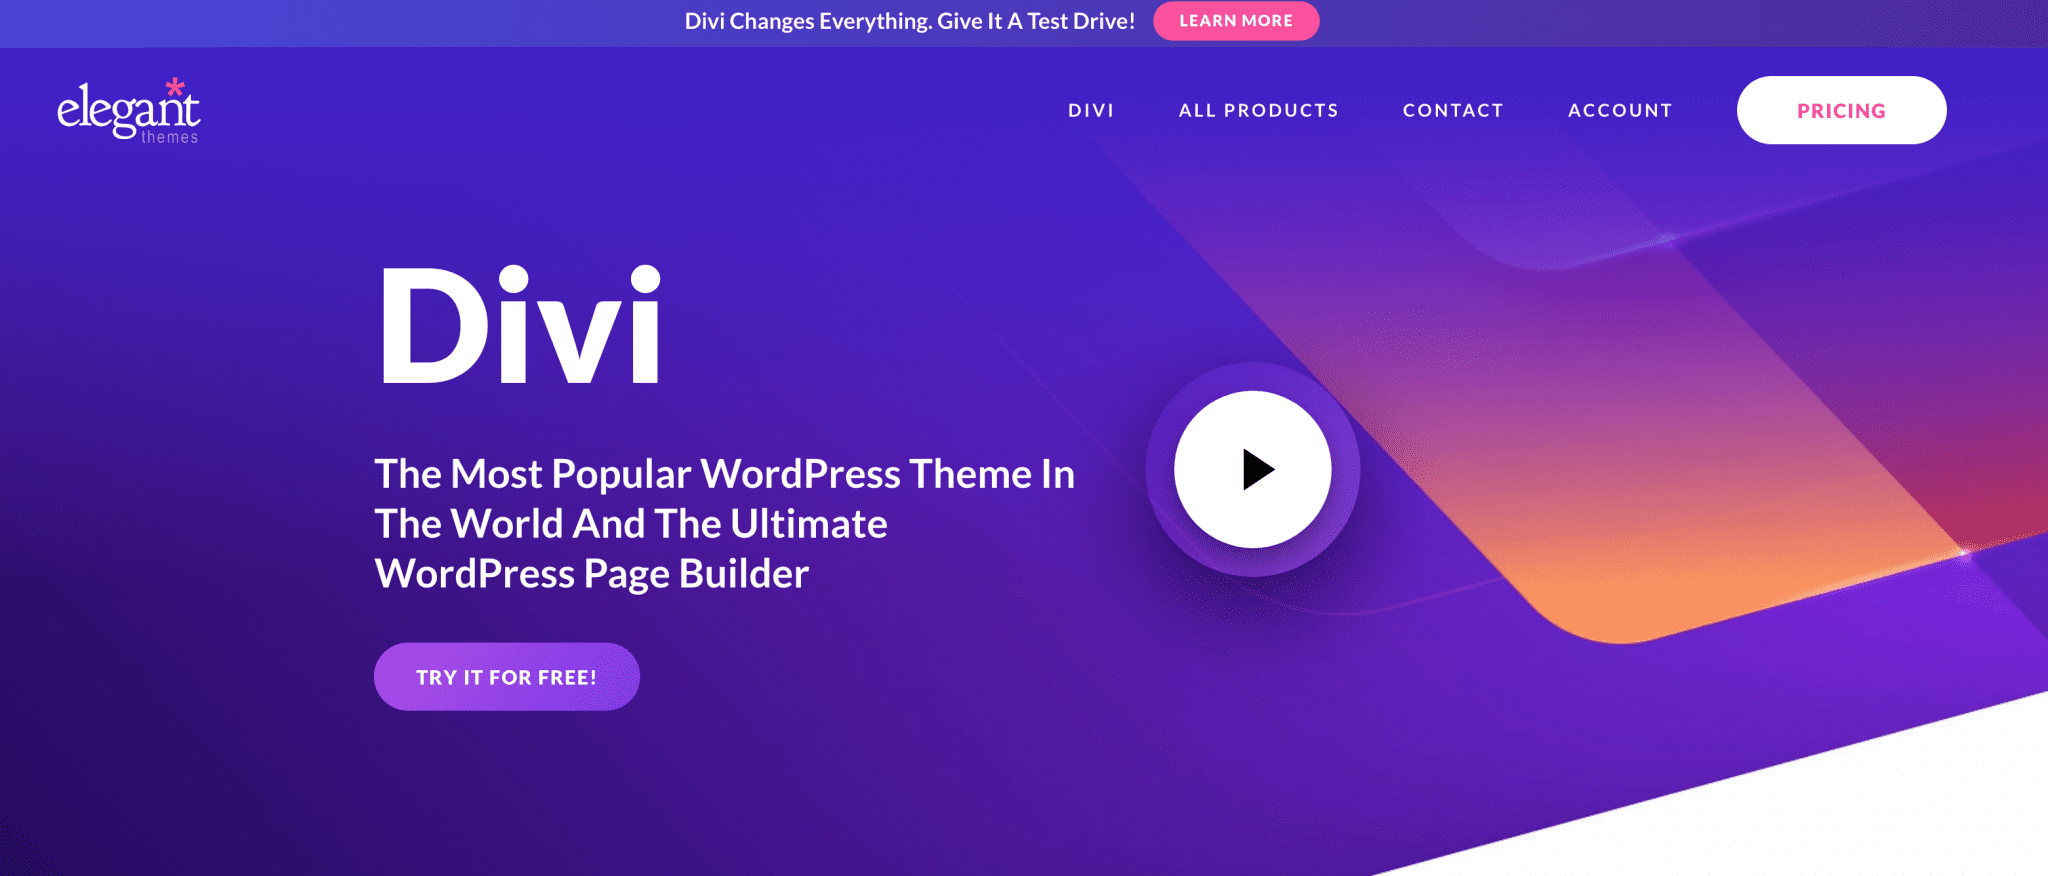
Why is Divi the best theme to make a website ADA and WCAG compliant? Mainly because it’s awesome, but double-mainly because of the Divi Accessibility plugin, a free plugin that sort of puts a compliance stamp on your site.
To make the crystal clear, their plugin is a FREE solution to compliance. That means LESS WORK and LESS COSTS for you! 🙂
In general WordPress land, Divi is also highly regarded by developers, it has more downloads than most theme so you know people trust it for their livelihoods. AND Divi know has beautiful templates in their library which you can activate on your whole site to transform it from basic blog to beautiful resort site, for example.
All of my website projects that involve ADA compliance as a requirement are built with Divi, so I fully recommend it to you too.
Yes, you can make any WordPress theme ADA compliant with enough work and edits, but Divi will make life easier for you AND it’s less likely that a legal team with challenge Divi because it is known for it’s compliance.
Step 2 – Run the tests
Okay, so you now have WordPress running, and maybe you even bought Divi like I recommended. I hope at least a few of you listened to those two components.
Now it’s time to run the basic ADA and WCAG compliance test and see how you stack up to major brands like Apple or Home Depot.
If only we knew which test was the best WCAG 2.0 compliance test to run?
The basic test you will find and can run easily is the WebAccessibility.com test. You will get a nice percentage which either looks nice or awful. It’s easy and free to compare compliance results to other websites too (for example Apple.com routinely clocks in at around 83%) But, this is just one number.

HOWEVER, best and most high-calibur ADA and WCAG 2.0 evaluator test I’ve found on the web is the Functional Accessibility Evaluator 2.0 built by Illinois.edu (educational website = more credible).
To run this test just create a free account with your email, pick a username which you’ll use to login, then go for it. It’s a larger test so it will take about 4-5 minutes to complete.
You can save tests too, just save the link to the test results and you can pretty much pull them up anytime (for example for a before and after screenshot which is a super smart idea).
So here is an example of this Functional Accessibility test after it has processed a couple websites.
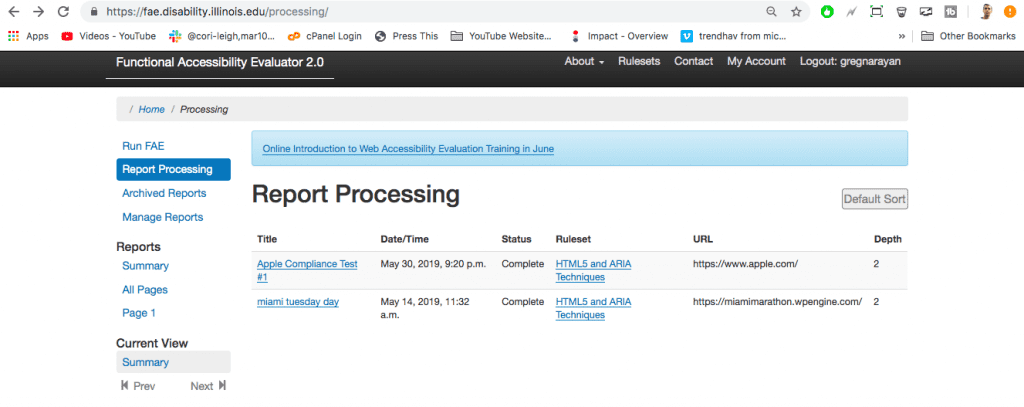
The first link is the test results for Apple.com and the second link is the test results for another website I was hired to work on.
I’ll click into the Apple test and show you, then create a side by side image of what the “miami tuesday day” test looks like (which as you can tell by the name, I was working quite a lot at multiple times of the day on!). Here is what you don’t want on the left and what you want to see on the right!
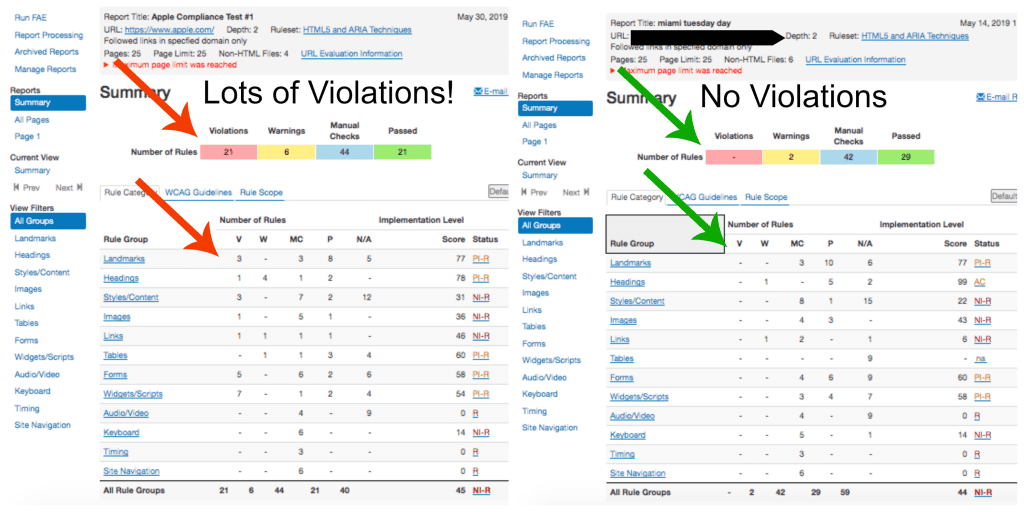
I should note that this FAE test runs on standard website features which every website has, like Headers, Images, Links and Forms. These categories are shown by the blue links on the left.
Your goal?
To make sure you have an ADA compliant website which meets web content accessibility guidelines by not having any violations in these Rule Categories.
In other words, you’ll probably need to fix some errors, so let’s cover each one and how to fix it.
Step 3 – Fix the errors to ensure ADA WCAG compliance
Okay, so your new WordPress website with Divi theme is more compliant than most, BUT, there are still several errors you should know about.
Let’s take a look at the most common errors, and how to fix them (I’ve fixed each one for clients in the past, which I recommend you do too, however if you’re on a tight deadline then do the best you can here).
Landmarks – Landmarks introduce website sections to a screen reader. In WordPress, the way to fix Landmarks violations is to header to your appearance, editor files and add Landmarks to certain existing divs. The Landmarks you’ll need to pass this part of the test are Banner, Navigation, Main, Complementary, and Content Info. This guide at Theme Foundation explains how to add Landmarks. It may take some trial and error placing these roles inside your divs, but at least you can run the FAE test as many times as you want!
Headings – Web accessibility likes H2s inside your content and that’s about it. Even if you have an H3 under an H2 it can trigger an error. Thus I’ve found the easiest way to solve Headings errors is to remove all H3-H6 tags on my pages. Keep H2, then use bold after that, and definitely do not use H1 tags inside of a post or page you create.
Styles/Content – This is arguably the hardest section to solve. Common problems are that your text is too light on a light background, or even too light on a dark background. If you are getting these errors, just keep your text dark on white backgrounds and make your text larger. Do not get testy with the CCR threshold metrics, keep them well in check. To make a fully ADA compliant website, you may need to adjust some li and ul tags too. Just keep your li tags inside ul or ol tags. If you are getting language violations, let me know and I can suggest a plugin.
Images – All images need alt tags. Add your alt tags when you upload an image to WordPress so they apply everywhere the image goes. That’s the most common error and probably also the one you’ll spend the most time fixing, but just do it if you want a WCAG complaint website.
Links – Link text must describe the target and be unique. So instead of writing “learn more” 95 times on your pages, write a unique version like “learn more about clinical psychology” instead. After all, how is a blind person supposed to know which “learn more” button is the right one when there are 20 of them?
Tables – Tables like those made in TablePress will throw all sorts of errors at your for names and labels. The fastest way to fix table errors is to simply delete your tables and find a better way to write that info into a Text widget or page.
Forms – Forms needs labels, meaning each input field needs it’s own label in text and also in the code. You’ll likely need to look up some examples of exactly what you’re working on for how to make a form ADA compliant.
Widgets/Scripts – Deleting scripts which are simply unnecessary to your website’s goals is the easiest way to fix this one. You can also label such widgets or scripts.
Audio/Video – Next it’s time to make sure your audio elements play at the right times, meaning they don’t just play automatically without a clear play button which a blind person could not find, and that your audio elements don’t convey unique information which a deaf person might miss.
Keyboard – It’s also possible that a common keyboard couldn’t be used to access each of the items on your page. You need to make sure the tab button and other commonly used keys work on your website’s features.
Timing – Last but not least, any item on your website which is delayed upon a page loading may cause your page to become ADA or WCAGS non-compliant. Just make sure everything loads fast and any unnecessary jQuery is removed.
Well there you have it, you budding ADA WCAG expert you. You now know how to fix and also speak on the most common areas that hurt a non compliant website.
Step 4 – Prove your results
Okay so by now you have completed the following steps to reach ADA WCAG compliance:
- Setup a WordPress.org website
- Install Divi theme to make compliance easy
- Fixed each error from the Function Accessibility Test evaluation (or a similar test)
You have a super pretty website because … it’s compliant! And you’re more protected from getting sued!
But, how do you show people all this? How do you prove it?
What you need to do next is create a document (just a simple Word Doc will do, as it usually does) to highlight the steps you’ve taken, showing before and after, which certifies that your website is now both ADA and WCAGS compliant.
It’s this kind of document which any legal team loves holding onto, and can reference should anyone challenge you.
Go for it, bust out a fresh Word Doc or Open Office Doc if you don’t have Word, and test out your formal document writing skills.
Lastly, add a section where the appropriate members of your teams can sign off on. Then create a PDF out of it and presto, you’re done.
Note #3: If you need examples of the documents I’ve created to give to my legal teams and clients, please just ask.
Conclusion
I hope the above article helped you make a WordPress website ADA and WCAG 2.0 compliant. If it did, let us know how it went for you in the comments. If you hit any roadblocks, I’ll help you fix them in the comments too.
I’ll leave you with a question: How do you feel now that you have all this new knowledge? Does your brain hurt? Or is it a good feeling? You’ve just leveled up your WordPress skills in a major way, and can now help a lot more people, so we hope it feels good!

Big Fan Your Blog’s.
For products Review blog visite my website.
Americans with Disabilities Act, Compliance guide really helpful for me.
Happy to help!
This can be a very informative and helpful post, very genuine and practical advice. It is actually very great for all users. Specially this article is helping to the beginner. Thanks!
Thanks for sharing your knowledge with us. all tips you provide in your blog post very informative for me. Appreciate your work.
Great post, I was able to learn many new things in this blog post. I heard a lot about gdpr compliance and read many guides about it. but this is the first time i have seen a blog post giving complete information about ADA and WCAG 2.0 Compliance. Thanks a lot for useful information.
Hello,
Very informative post, glad I came across this article.
Keep sharing more such posts in the near future.
Thank you…
I usually do not comment on posts but this article stands out from others. I could learn several new things from it. It is great when you are able to gain an understanding on topics that were unknown. Thanks for that.
Your article is very interesting.
Thanks for sharing. I found a lot of interesting information here. A really good post, very thankful and hopeful that you will write many more posts like this one.
Great post, thanks for sharing this valuable information with us all. It’ll be a great help to all the people following you. You’ve got an amazing blog and we’ve bookmarked for further reading. Good work keep it up.
Great tips! I will definitely try the strategies that you have shared here to my blog. Thank you for sharing this, very informative and helpful!
Hi Greg,
This is indeed a great and timely share all web developers and owners should make note of this to get away from the penalty.
I fully agree with all the points except one on the recommendation on Bluehost, I never recommend this to any because of the nasty experience I underwent with them. I am sure this is good for its affiliate marketers not to the web owners. Sorry to note this.
Keep sharing.
Will add share with others.
Best Regards.
Philip