 Hi Everyone! If you’ve already made a blog with us, I hope your blog is doing great! If you still need to make a blog then you should know I’ve been hard at work on something very special for the community and it’s finally ready: How to make a blog that looks like DearBlogger! At the request of many, this post explains ENTIRELY how to make this blog, including the theme, logo, pages, even sidebar features and useful lessons from my past 5 years of blogging. Using this tutorial you’ll know you at least create a blog that works to get your business traffic, comments and social out of the box and I’ve bundled it all to be made easier for beginners to create any niche blog. Please skip around using the anchor links. I hope you love it as much as I do and can change the world with this. The blogosphere needs you. Let me know what you think!

WordPress founder Matt Mullenweg said “whatever I do, I always come home to my blog” but wouldn’t you rather come home to a blog filled with life, love and discussion as opposed to a blog where you are constantly editing the design, adding and removing features and never quite sure it works or looks good?
Blog design is a HIGHLY under-discussed topic. It drives us mad when we start a blog. Some sources report that not understanding blog design is the #1 reasons why blogs and bloggers fail.
Well in this tutorial I’d like to pass of my biggest blog design ever: Dear Blogger. I created it through years of tinkering, hundreds of late nights ordering pizza, and now what to give it to you so you can get WordPress blog comments, likes, earnings and more.
From theme to hosting, content to ad placement, design to logo – we will learn how to make a blog that’s gotten over 3000 comments and 5000 email subscribers in 5 amazing, unforgettable years.
If you’re ready, I think I finally am too. Grab a your favorite drink (mine’s pretty obvious) and let’s hop over to my computer and see what it really takes to make a great blog.
♨ Jump ahead — use these quick links! ♨
House analogy | The techie stuff | WordPress themes | Nuts and bolts of editing | DearBlogger post types | Where to find images | Clean up your permalinks | Ranking blog posts in Google | Pages: less is more | Mapping out menus | Logo design | Our finest plugins | Social proof | Google fonts | Editing CSS | Email marketing | Flip and tile images | Google adsense | Affiliate market your WP theme
Note: The video tutorial shows you how to make a blog and get all the fine details right. However this blog post and our free PDF guide have behind the scenes top secret screenshots which can explain topics further as you start a blog. So the best bet to create a truly successful end result is to use both (the blog post and the PDF contain the exact same content).
Note 2: You can literally use this guide as a step by step checklist to make a WordPress blog. Because it’s a blog post, you can also share the link with friends who want to create a blog on the web. It’s all yours, it’s free, it’s pretty groovy.
Note 3 (Greg rambling on): A few links below are affiliate links. If you click through and make a purchase this blog will earn some credit at no cost to you. I absolutely use and review these companies daily. I would never risk our trust over an affiliate commission.
Alright, let’s do this! 🙂

Starting a great blog is a lot like building a house
You need three basic things in order to start a blog the right way these days. It’s actually a lot easier than making an actual home, or an apartment in a busy city like New York for that matter 🙂 But I still find the analogy to be a useful one.
- An Address:
Your domain name is the address people will type into their web browser to find and read your blog. It is an address on the web, just like Twitter.com, Instagram.com or Amazon.com. - A Plot of Land:
Your web hosting is the plot of land where your blog will live. Think of web hosting like a hill or grassy space where you will start building. Just like it’s important to pick a safe neighborhood where you’ll build your home, it’s important to pick a high-quality web host in a trusted online environment that’s not over-priced or vulnerable to glitches. - A Home:
WordPress is the home you’ll come back to each day you want to blog. We will use WordPress.org because it’s the full version – we don’t want your home limited in size, amount of visitors or what you can do or say inside of it.
Once you have these 3 crucial parts of a blog you are on a level playing field with massive popular blogs like ProBlogger, Time Magazine, Forbes, Tech Crunch and more. But, I know that most of you reading this have actually already setup a self-hosted blog. So, let’s move on.
The only techie stuff you need to make a WordPress.org blog
Just quickly to recap if you still need to install WordPress, you can accomplish it in these 10 steps outlined in the video. You will follow the best method available today which is to:
-
- Get a domain name (you can do this anywhere, though GoDaddy is my choice at dearblogger.org)
- Register some HostGator hosting (HostGator is the that powers Dear Blogger around the world. My rational here is you want your domain and hosting at different places in case you need to switch one later, though I never have. Also, you want to choose a domain name specialist and a hosting specialist for better customer service.)
- It’s important that you can setup hosting with a previously registered domain, or you can get a new domain at the time you register hosting. The only difference in your setup will be when you connect you domain and hosting. This has to be done at the place you registered your domain name, called your registrar.
- Once you complete 1. and 2. check your email for a Billing email from HostGator
- Click on the billing portal link and login
- To install your copy of WordPress (your new home) click on the hosting tab. Then simply click on the WordPress.org icon that says Get Started With WordPress Today (they are pretty blatant at HostGator)
- Select your domain name, click Next
- Enter in your basic Install Settings (Blog Title, Admin User, etc)

- Click Install and wait for the Installation Complete message. Leave this window open.
- Come back to your email and it’s time to connect your domain name with hosting. We cover this process with a GoDaddy domain name in the video. You will need to connect your domain name and hosting at HostGator if you got a HostGator domain name. This is done by clicking on Domains (next to the Hosting tab) then click on the gear icon, then click Change by Nameservers, and enter in your own two nameservers which were sent to you in a separate email from HostGator. Here’s a video on how to change nameservers at HostGator. This step is a little redundant, but it’s 100% necessary, so make sure to get it done right after you install WordPress).
Aside the techie setup, which is covered entirely in the steps above, the most important pieces of your blog’s future success actually fall into place within the first 3 months of your blogs existence.
You only have one shot at a first impression with readers, so we have to maximize the power of that little moment.
Let’s work on the most important step to ensure a good first impression at your blog – your theme.
So now let’s talk WordPress themes…
![]()
After you learn how to get from the front end to the back end (and back and forth) on your site – a process which was actually a little mind-bloggling for me the first few times – it’s time to think about how to change the way your new site looks.
What is a theme? Why doesn’t my site look like a blog? What is that stuff on the right?
We have all the answers, as usual.
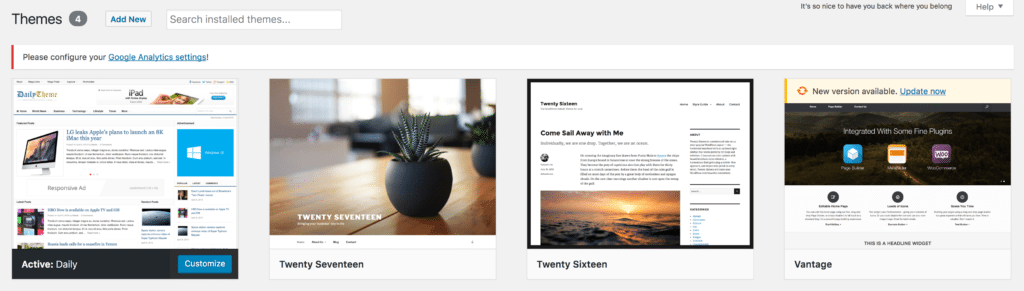
Your theme right after you install WordPress is the default theme (like Twenty Sixteen, Twenty Seventeen, etc). You can try out any free theme for free, just open it and click Activate. These themes are all really successful and beautiful- which is why millions of people use them.
But, the fact that millions of people use these themes is actually downside. We want your site to be drop dead gorgeous and for that it needs to be unique.
The good news is that for a blog, we can keep it pretty simple while still being beautiful and unique. At DearBlogger, I do that with a WordPress Magazine style theme called Daily from Theme Junkie.
In the video we learn how to purchase Daily, and at the same time get a coupon “startyourblog” which when entered at Theme-Junkie will make the price of one theme just less than the cost of their all themes package.

So, in other words, the option I recommend is to purchase their All Themes package and go ahead and enter this coupon “startyourblog”. You will get all Theme Junkie themes for $36.75, less than the cost of one theme. Considering most other premium themes at other vendors can cost anywhere from $50-100, this deal out to make any new WordPress site owner happy. That way you can try out any theme on any website or blog you create in the future.
So, now you have about 30+ free themes. If you have time outside your day job, try theme out, you can literally make a website beautiful with any of theme.
General steps to upload any WordPress theme:
- Buy the theme (we get a great theme deal in the video, but I’ve also bought from ThemeForest.net)
- Download it
- In WordPress click Upload Theme > Choose file
- Find theme on your desktop
- Find the theme (like daily.zip) and click Open
- Click Install Now and wait a moment for WordPress to install it
- Click Activate
That wasn’t so bad was it!
The nuts and bolts of editing a WordPress website

In WordPress there are generally two different (but you need to explore both) ways to edit a WordPress blog or website. The first is Customize, the built in WordPress editor, and the second is your Theme Options or Theme Settings. Both Customize and Theme Options will change in their options depending on the Theme you’ve chosen. So once you install your WordPress theme it’s really important to check out both and play around a bit.
Customize: Reached by visiting Appearance > Customize. Useful for built in WordPress tasks and edits.
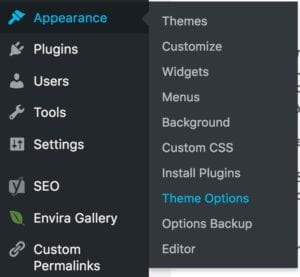
Theme Options / Settings: Reached by looking in the upper left corner of your blog and clicking on your theme’s name. Also may be nested in Appearance. Here is well you can do theme specific tasks, and use the many built in features your theme comes with.
Like I hinted at above, some themes will come with a more advanced or luxurious Theme Options / Settings than others. Some themes which offer a ton in this department are Daily, Virtue, Vantage and Simple Catch, to name a few.
The first posts to write once you make a blog
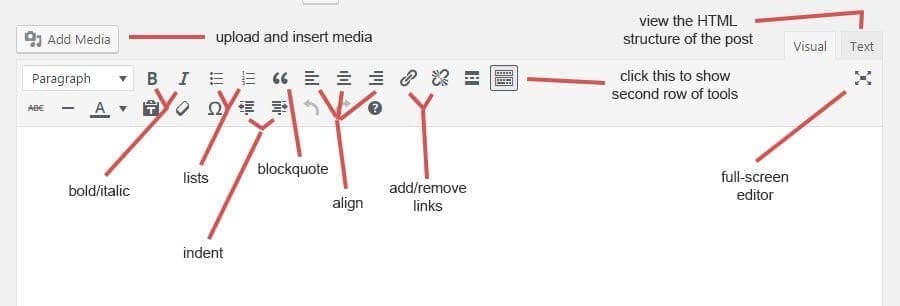
The video will show you exactly how to navigate the WordPress new posts and pages editor. Of course, some of you may also want to just look at this post and gain full WordPress consciousness. If that’s you, I’d recommend checking out this graphic my ol’ friend Thomas Frank made and following it’s advice.
If you can figure out Microsoft Word (I struggle with Word so I don’t know why I’m even going there in this comparison) then you can figure out WordPress. It’s literally just like writing one of those 400 journal entires in 5th grade or a paper in highschool when you create your next blog post. The difference being that, blog posts actually count for something 🙂
The hard part is deciding what types of blog posts to write.

There’s no absolutely right way to start a blog post and you’ll have about 100 different blog post ideas in your head when you start a blog. So it helps to have some direction as to what sorts of blog posts work on a newly launching blog.
Those posts which I know will work are:
- A welcome post
- A controversial post
- A long-form guide post or ultimate guide

Simply put, these three types of blog posts work in any niche and are guaranteed to both establish you as an expert and attract comments. I know that’s a bold claim, and it is. The claim is backed up by the assumption that you’re a skillful writer and will write original advice that no one has seen before. Up to the challenge? If so, then the combination of these posts is proven to be successful and will look great on your blog once people start forming their first opinions of you in the blogosphere.
You have my word on that it will be winning combination using these blogs posts.
Further, as you add more blog posts and grow your blog, you can reference these three initial blog posts over and over again to make them slowly become cornerstone content that readers love turning back to for help.
Where do I get those fancy computer images?
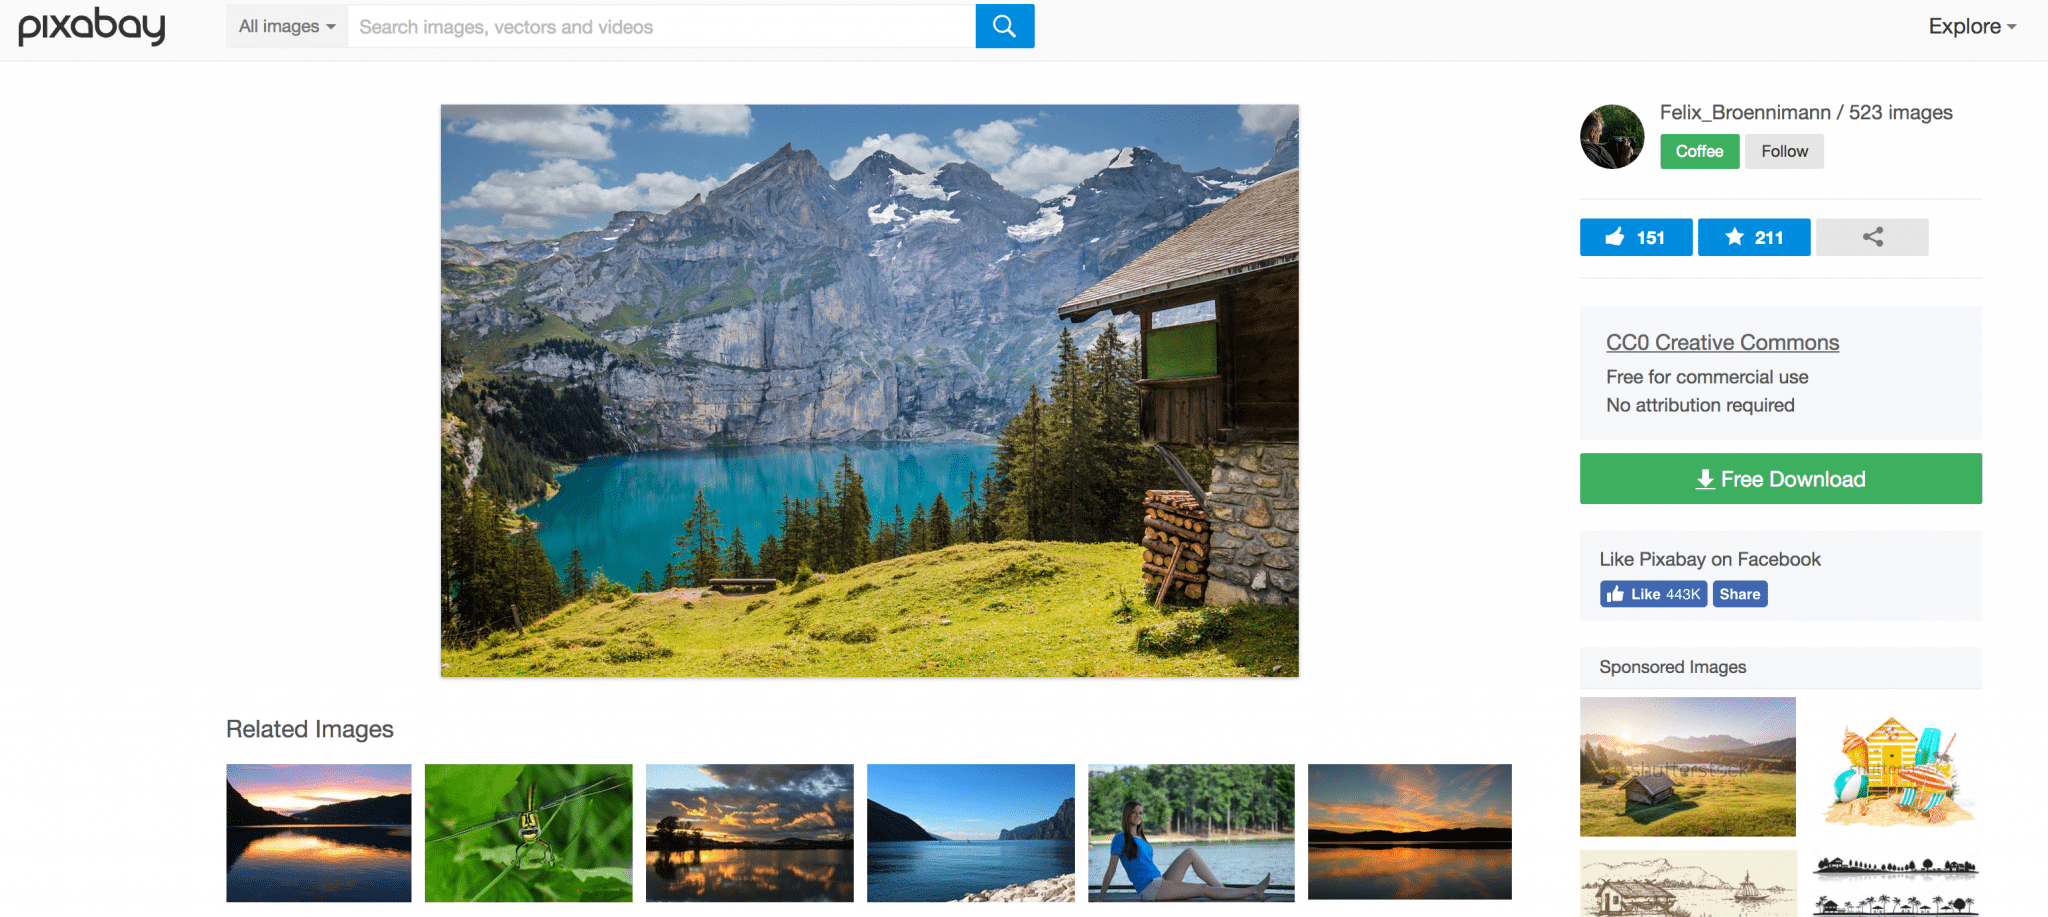
Pixabay! That was easy. Because that was easy, here are some you could use on your new blog which we’ve also used on previous blog posts.
Also, uploading images to WordPress is really easy. You just need to:
- Right click save image as on an image from Google or around the web
- Retitle and save it
- In WordPress click Add Media
- Upload Files > Select Files
- Choose an image from your home computer
- Click Open
- Click Insert into Post
Once you’ve written your posts and prettied them up with images, it’s time to think about traffic, the real people who visit your blog, and SEO, the process of ranking your blog posts higher in Google Search, so you get more and more traffic over time.
Learning a little SEO the moment you build a blog can really save time going back and SEO-ing posts later on.
First step to better SEO: clean up those permalinks

Speaking of helping your site in Google, take this one important step right now.
Go to Settings > Permalinks > Choose Post Name > then click Save
This will make sure the wording in your URLs aka your links are simple and accurately reflect what the post is about without including annoying dates or other jardon. In the old days when we launched Dear Blogger, we use the Custom Permalinks plugin for this task.
Now for how to rank blog posts in Google after you make a blog. Interestingly enough, this is actually one of the most common questions friend’s of mine who don’t run blogs yet will ask. “How do you get an article to rank at the #1 spot in Google Search?” So, aside from just telling you “backlinks”, we should probably explain it.
Ranking blog posts in Google
To make sure you blog posts have a good chance at ranking in Google, and what I do at DearBlogger, is to install Yoast Free SEO plugin and follow their check list that shows up beneath each post once you Activate the plugin. Other simple tasks, like writing longer posts, guest posting, and adding videos and additional resources will also improve your blog posts’ chances of ranking in Google 🙂
Ranking in Google is a large, humungous topic online. So I try to provide general topics than can help you get started and rank any sort of blog. For specific questions, it’s almost always best to use the comments below, especially if you can’t find the answer in Google (which it itself takes some practice).
Remember to do little things like managing your Yoast SEO each day at your blog and the bigger pieces of SEO will fall into place later on.
“Much of the lifeblood of blogs is search engines – more than half the traffic for most blogs.” – Matt Mullenweg
Add the essential pages
You don’t need a ton of pages to make a blog like DearBlogger. In fact, you only need a few – each page has a specific purpose too, like to allow people to subscribe, to deliver an eBook, or to help people guest post.
DearBlogger started with the following pages:
You might also want pages like Contact, Our Services, Our Work, Our Mission Statement, Gallery and so on. Keep in mind that less is more and you can actually combine pages to save people time click around your WordPress blog.
It’s really important to remember that pages need purpose. Adding random pages to just make your blog seem busy or popular will totally confuse people and hurt your blog’s progress.
Those couple sentences above are important!
Add menus to help readers navigate
Menus are the roadmap to a blog. Not menus or displaying them poorly can make people get lost. The good news is it’s really easy to create WordPress menus, and our Daily theme comes with both an upper and lower navigation. This is create for separating your page links from your category links, as we do here. You can also create custom links in your sidebar.
You’ll play with your menu details over time, just make sure to always and especially at first keep it simple.
Make a blog logo
Making a logo can be really hard and confusing. You will see many great logos and wonder if your logo will ever fit in. I’ll tell you right now though, that making a great logo is more about what you don’t do, than what you do do 🙂
You can make a logo that doesn’t work really easily. Just put in too many colors, fonts and graphics without any research or idea on why you’re doing things. This is obviously not the route we want to take.
Logo don’ts recap:
- Don’t use too many colors
- Don’t use too many fonts
- Don’t use too many graphics
- Don’t make it blurry
Now to make a logo that actually does work on your blog, you can follow some steps that we’ve followed at DearBlogger which I learned from reading other blogs that were dominating around 2010-2012.
Logo do’s recap:
- Use at most 3 colors
- Use at most 1 font
- Use at most 1 graphic
- Don’t make it blurry
Fortuntately, Logomakr.com has plenty of free graphics and isn’t blurry. You can also use a tagline as we do in the video. Just make sure it’s the same font as your logo text. Please note that the original Dear Blogger logo was made in pixlr.com, however pixlr.com is now considered by bloggers to be less beginner-friendly than logomakr.com. I would use Logomakr if I started today.
Now let’s move on and take a look under the hood of the sports car that is Dear Blogger (actually, it feels more like an old minivan) and check out what plugins you need to use to make a WordPress really run blog like DearBlogger, and maybe a few new plugins you need to learn.
Adding plugins: DearBlogger’s version of coffee
Just by installing a few amazing plugins you can make WordPress blogging a lot easier. You can follow the video to simply install each plugin and use it out of the box as we go, or you can copy this list:
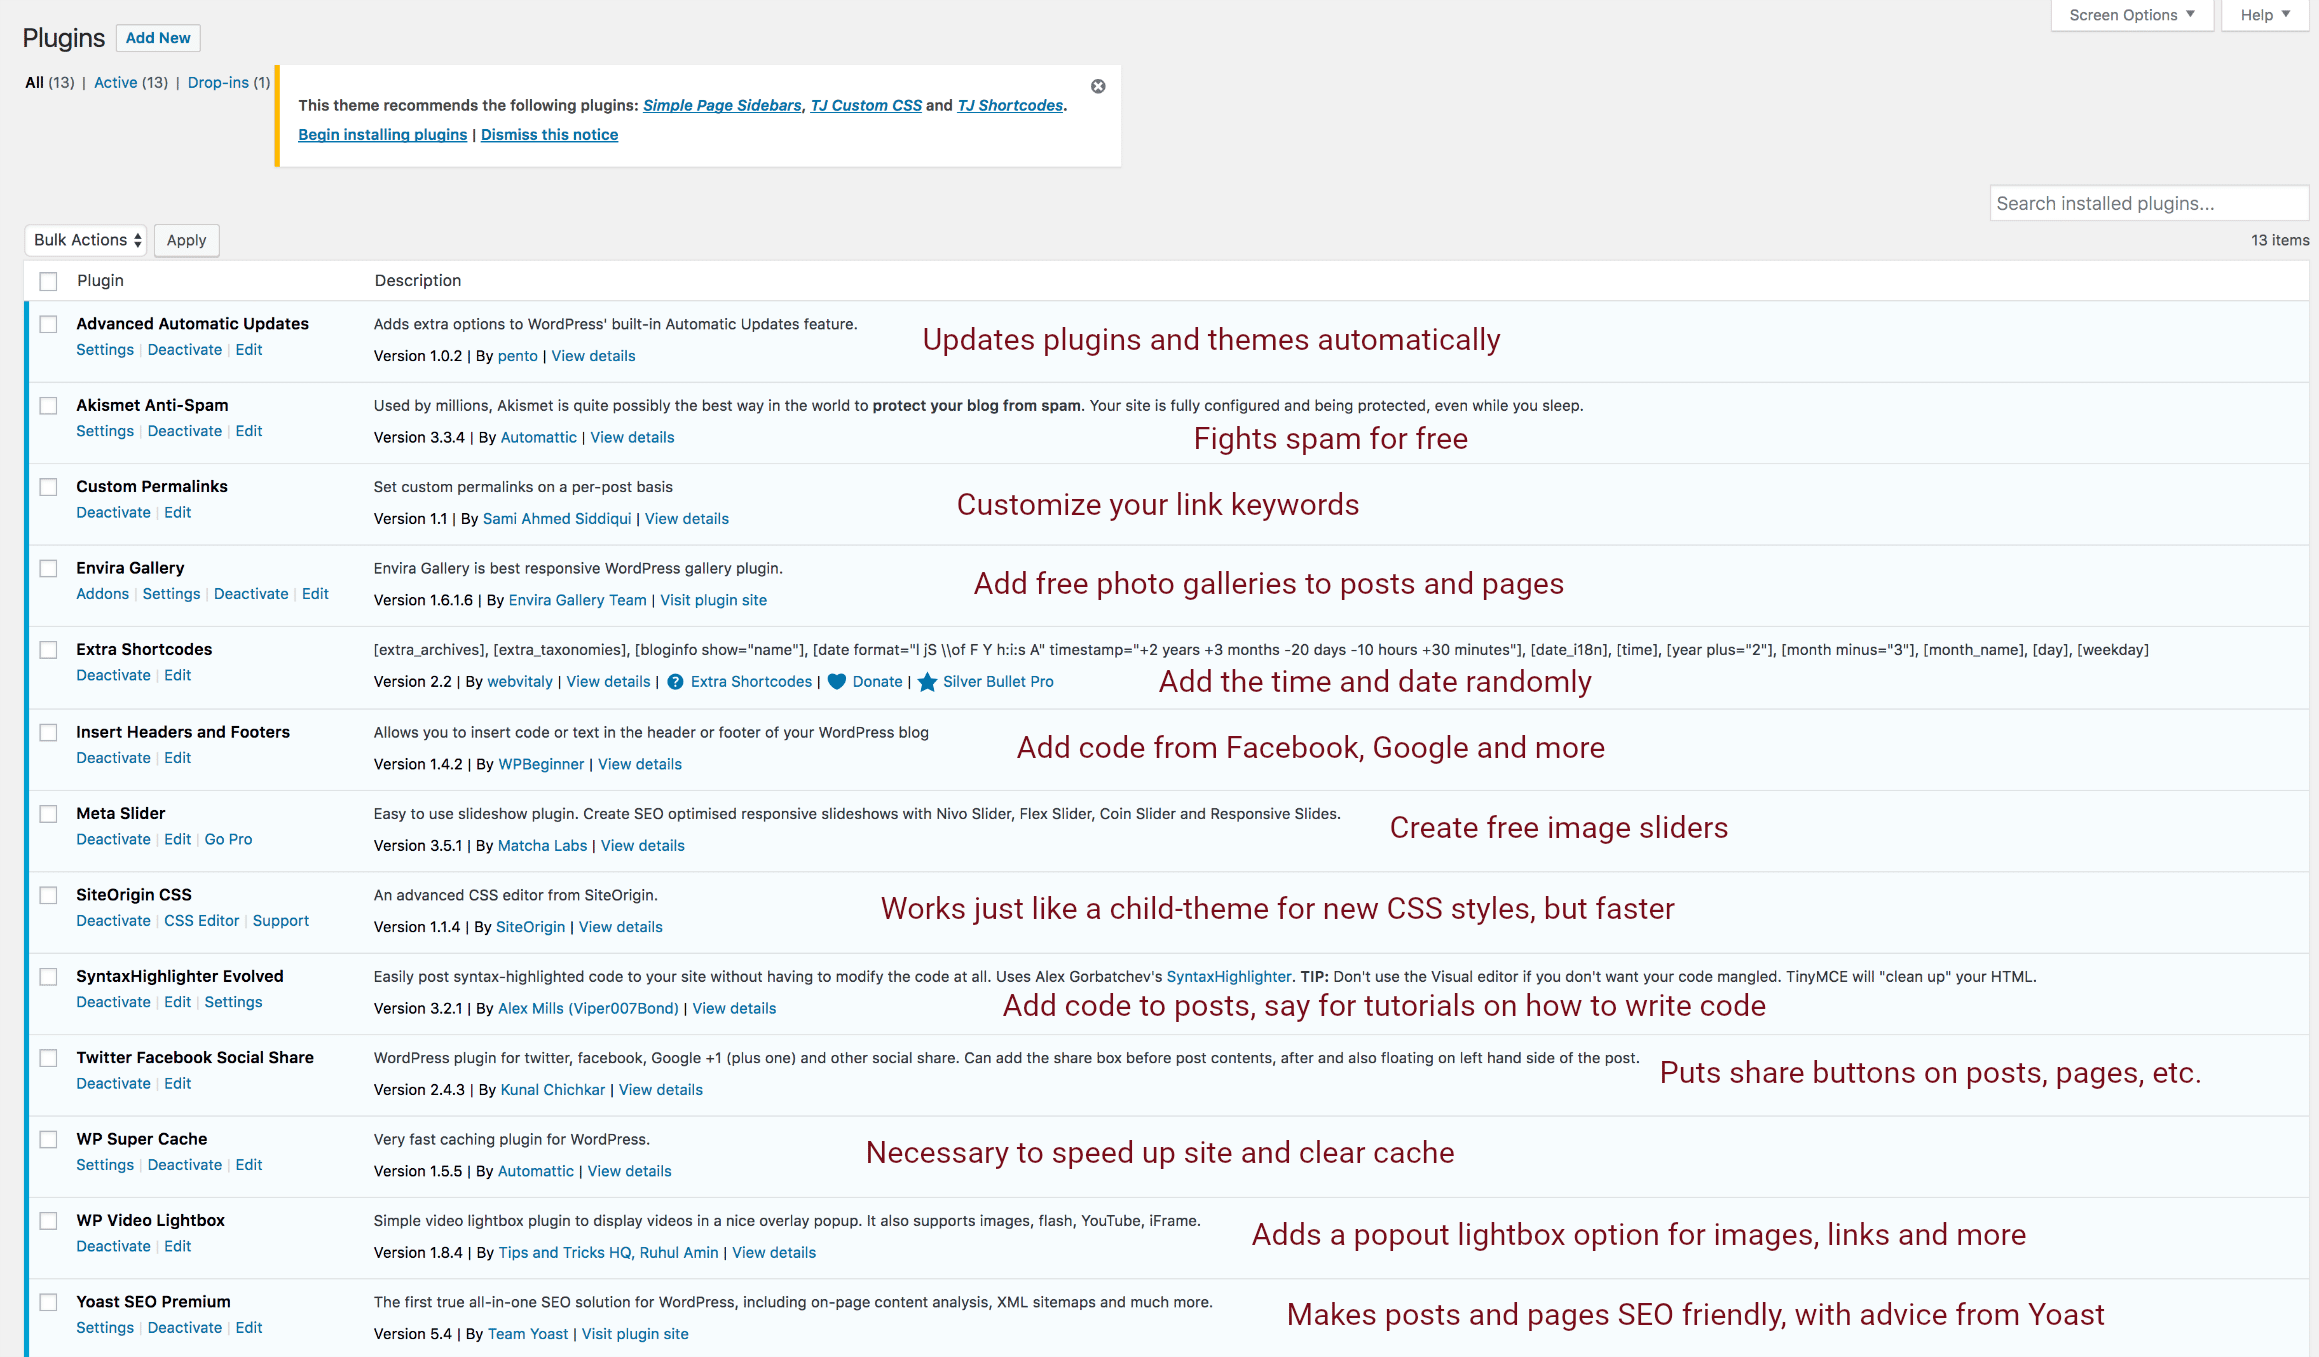
The video will show exactly how to setup and install each plugin.
“For me, open source is a moral thing.” Matt Mullenweg
Building social proof on your blog
Right around 1 hour 32 minutes 50 seconds in the video I mentioned something called social proof which is actually quite important to get a blog growing while you’re away from it.

Definition of Social Proof: Social proof (also known as informational social influence) is a psychological and social phenomenon where people assume the actions of others in an attempt to reflect correct behavior in a given situation.
Then, once your blog is social proof, as Kissmetrics describes when talking about social proof, you can use your influence to launch products with larger than normal traction, write reviews which companies will want to share on their websites, and even get your logo featured on other blogs and websites to help build their social proof!
Social proof sounds like a strange thing at first, but it’s a necessary science that applies to most (not all) popular blogs.
Adding Google fonts to your blog sidebar (or anywhere on your blog)
We’ve cover this topic several times, like in the below video. Google offers tons of free fonts, and by following the steps below you can add them to any WordPress website or blog.
Keep in mind you won’t need more than 3-5 fonts on your blog and using more than that can actually slow down your entire site.
Learn how to edit CSS at Dear Blogger
In the WordPress tutorial video we’ll see how to edit a couple different kinds of CSS along with the HTML that structures it. In WordPress, CSS and HTML generally go in two separate locations, however they interact with eachother through the theme files, as well as in your posts and pages.
You can write CSS right into a page, for example:
This blog post is <p style="font-family: Impact; font-size: 20px; font-color: green;">awesome</p>, so I made that word stand out.
It’s really nice how WordPress has a Text tab in each post and page editor so we can write code directly into a post or page. Also, if you insert an image, you’ll realize WordPress creates the image HTML for us right there in the Text tab. You can even copy paste larger pieces of code, for example like boxes or subscribe forms, directly into posts and pages. The WordPress post editor can handle it all.
You can also write CSS into a custom CSS window. At Dear Blogger, we do it both ways. Sometimes you’ll want a quick little line of CSS when you’re writing a post or page, and sometimes you’ll want your CSS stored in the custom CSS window when you want to make global or site-wide changes.
The following CSS code is use in the video demo and goes right into your custom CSS window provided by Site Origin CSS:
#primary.content-area.column,
#content.site-content.column {
  height: 100% !important;
}

.categories-widget {
  width: 300px;
}

.floatleft {
  float: left;
  padding-left: 8px;
}

.floatright {
  float: right;
  text-align: right;
  padding-left: 55px;
  border-left: 2px dashed #ccc;
}

.single-left{
  float: left;
  padding-right: 10px;
  padding-bottom: 10px;
}

#logo {
  max-width: 38%;
}
There are many more ways to use CSS and HTML at a blog, but these are generally how it’s done at Dear Blogger. This is also how I began to learn code with WordPress.
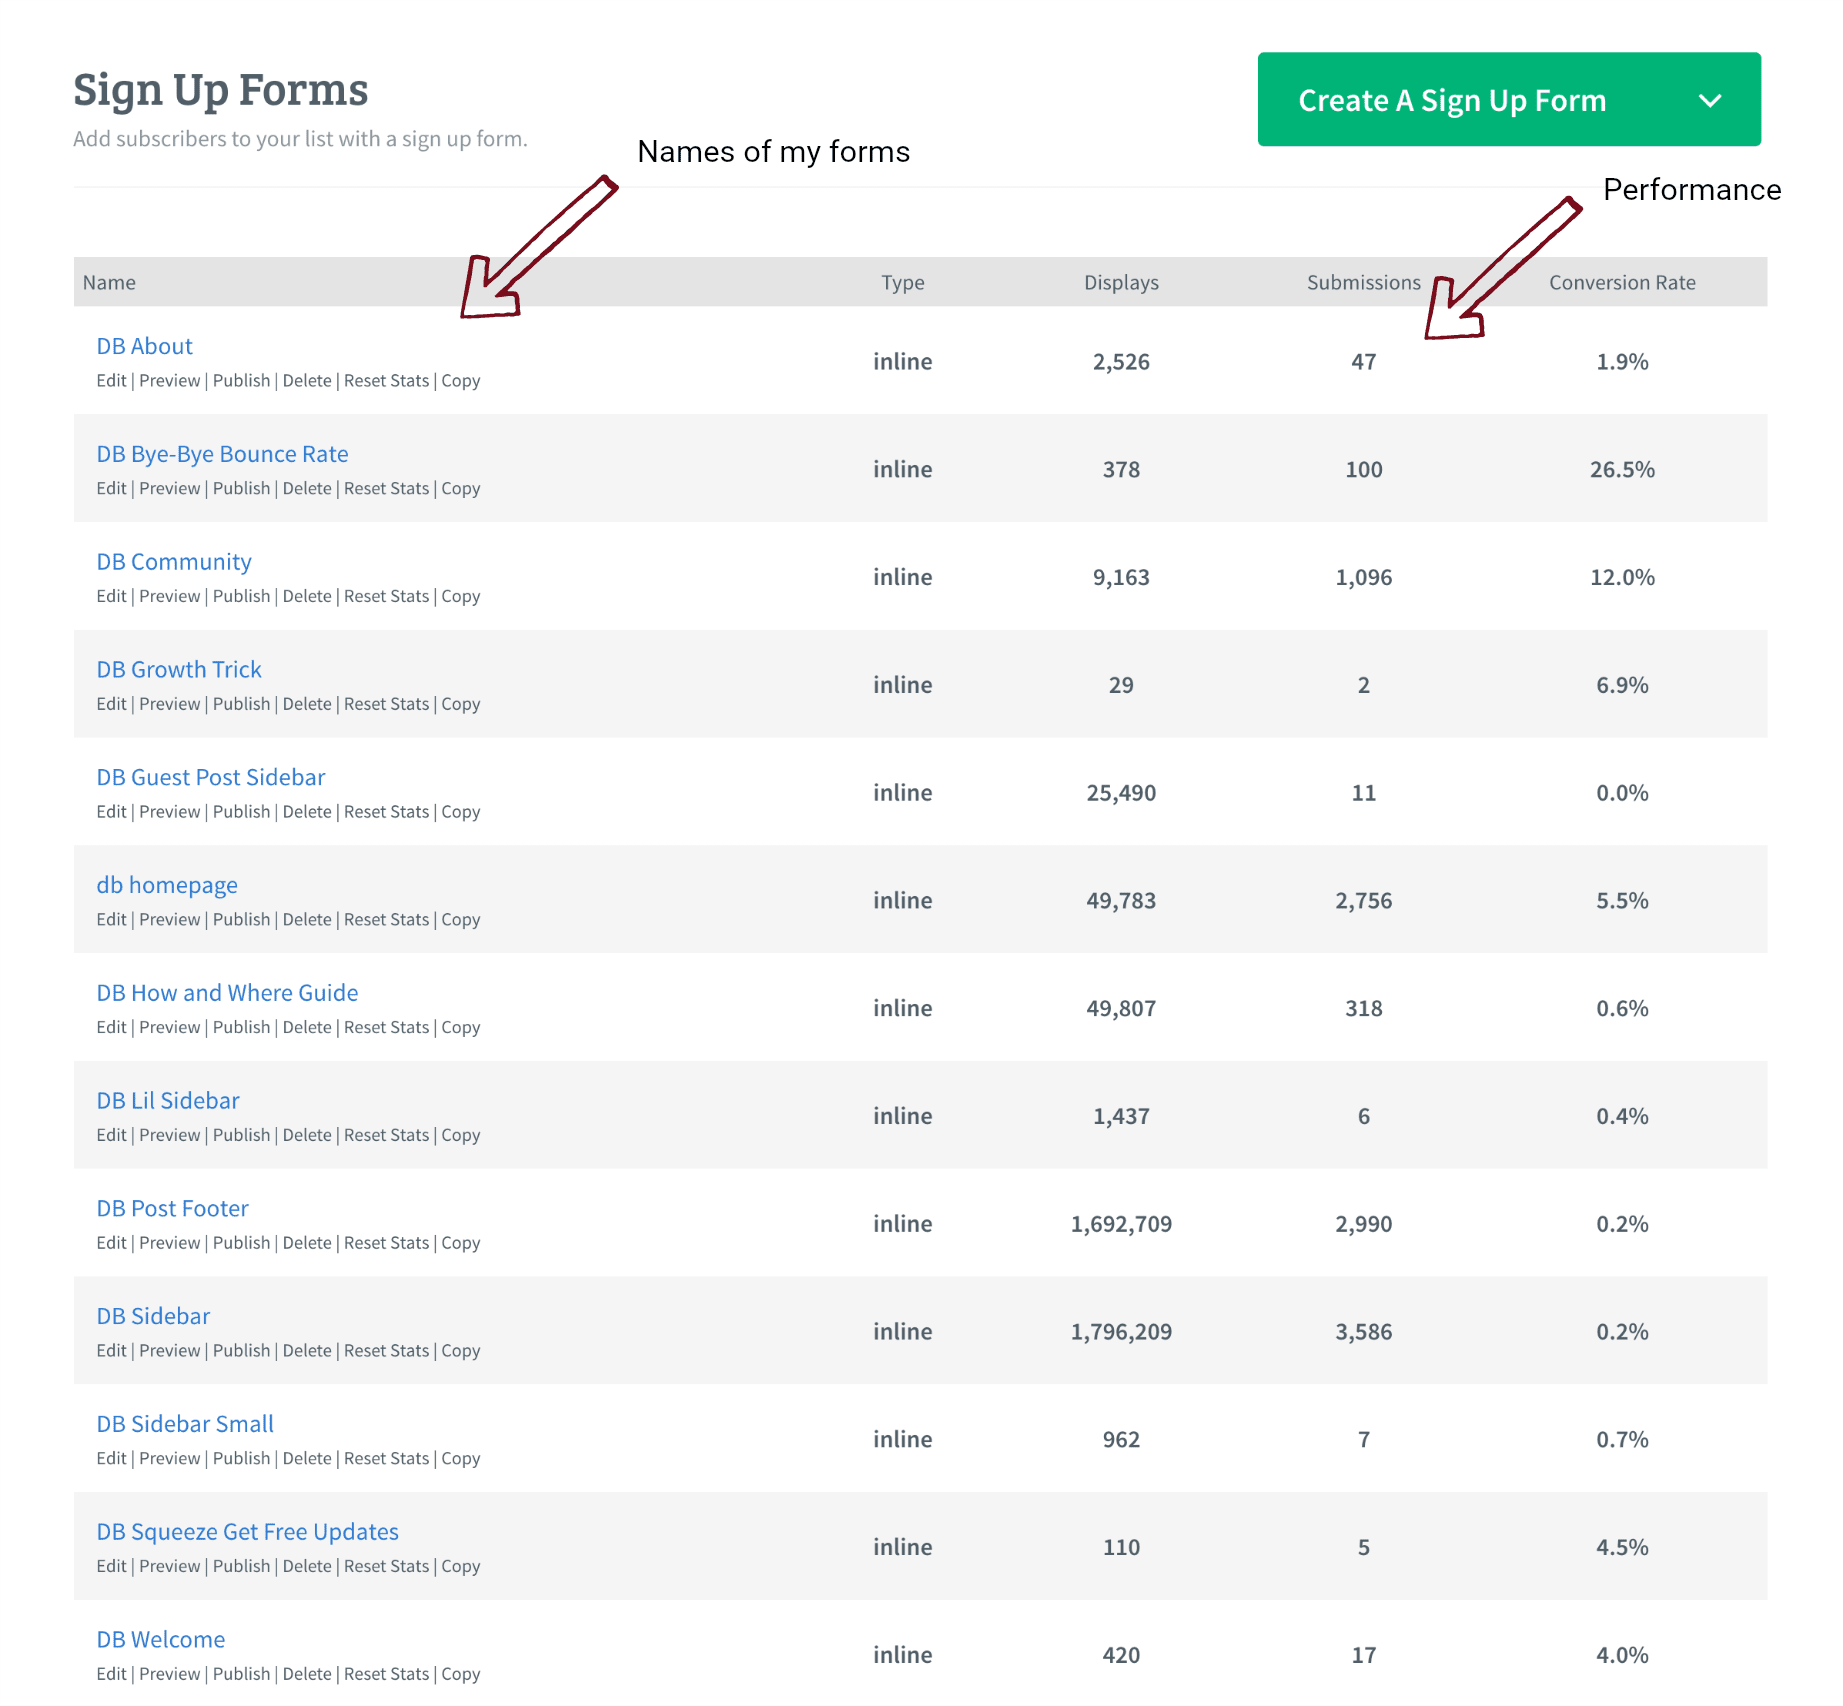
Email marketing: getting people to sign up to your blog’s email list
At Dear Blogger, we have gathered some 5,000 strong email subscribers through several forms placed through the blog in strategic locations.
Honestly, to create a successful email list is not that strategic and anyone who tries to market you on strategies to create an email list is just highlighting their own numbers and selling you a product. What it boils down to to get email subscribers is just to be a genuine person (suprisingly still rare online) and actually offer an incentive (like a free eBook or a newsletter, just something more than “get my next post”). We’ve been through a lot of fluff in the past 5 years, believe me.
Everyone who signs up gets a free eBook on reducing bounce rate.
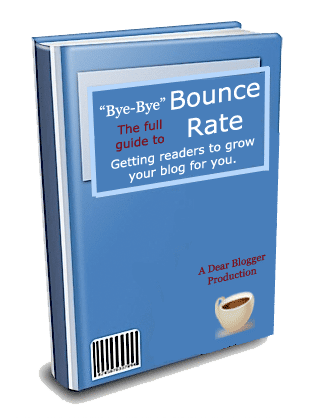
It’s pretty simple – and given I created my eBook for free it cost me only the $1 sign-up trial fee at Aweber to get started.
How to make images flip and tilt
In the same way that I had to get creative with a small budget and make a blog eBook, I had to get creative with the blog’s graphics. Now, I often ship out to Fiverr or buy from go-to designers, but back then, this wasn’t an option, and the days of coming up with crafty little graphics on my own were actually some of the most rewarding days of WordPress blogging.
The image on the left hand sidebar is a prime example. It flips while displaying a quote from ProBlogger’s former editor, an amazing woman and super editor of sorts.

So, after 5 years of questions on how it works (just kidding, it only felt like a few years) here’s how this image flip works and can be replicated on your own blogs…can’t wait to see it!
The image itself in HTML form, which goes in your sidebar:
<div class="morph pic">
<a href="http://www.problogger.net/archives/2012/10/24/the-only-seo-your-blog-posts-need/" target="_blank"><img src="https://dearblogger.org/wp-content/uploads/2012/11/ProBlogger-boast2.png" alt="" title="ProBlogger Badge" width="325" height="124" class="aligncenter size-full wp-image-3893" /></a>
</div>
This image flips with that “morph pic” tag and some simple CSS, pasted into my custom CSS window. The CSS is:
.morph {
  -webkit-transition: all 0.5s ease;
     -moz-transition: all 0.5s ease;
       -o-transition: all 0.5s ease;
      -ms-transition: all 0.5s ease;
          transition: all 0.5s ease;
}

.morph:hover {
  border-radius: 50%;
  -webkit-transform: rotate(360deg);
     -moz-transform: rotate(360deg);
       -o-transform: rotate(360deg);
      -ms-transform: rotate(360deg);
          transform: rotate(360deg);
}
The tilting “As Seen On” logos operate in a similar fashion. They are just stacked.
<div class="tilt pic">
<a href="http://www.dailyblogtips.com/how-to-really-grow-your-blog-traffic/"target="_blank"><img src="https://dearblogger.org/wp-content/uploads/2013/06/Daily-Blog-Tips-feature.png" alt="Daily Blog Tips feature" width="204" height="69" style="border: 1px solid #fff;" class="aligncenter size-full wp-image-14319" /></a>
</div>
And, the CSS:
.tilt {
  -webkit-transition: all 0.5s ease;
     -moz-transition: all 0.5s ease;
       -o-transition: all 0.5s ease;
      -ms-transition: all 0.5s ease;
          transition: all 0.5s ease;
}

.tilt:hover {
  -webkit-transform: rotate(-10deg);
     -moz-transform: rotate(-10deg);
       -o-transform: rotate(-10deg);
      -ms-transform: rotate(-10deg);
          transform: rotate(-10deg);
}
Feels good putting an answer out there to that question finally. Just can’t wait to see how you guys do it 10x cooler now and make Dear Blogger look all plain and average.
Google Adsense 101
Google wants us to optimize our ads – they’ll make money when your ads perform well. Don’t get me wrong, they’ll make money either way 🙂 But they’ll make more money if you make more money.
Note: the video includes some screenshots on how my ads are performing. It’s nothing special, but better than nothing!
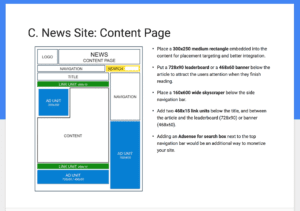
So, it’s time to take a look at our Google Adsense cheat sheet for a news content style blog (most blogs fit this category).
If you’re still on the outside, here’s a video I made this year on how to sign up for Google Adsense and get approved.
In the video we learn how to place ads in your sidebar, below blow posts, and within the blog post content.
Theme-Junkie helped me put our blog post ad within the posts while I was in Mykonos. It’s a really nice gem having theme support around the globe, wherever you rest your head you’ll know your blog works.
The CSS Theme Junkie wrote for us to get that ad in the posts is:
.single-left{
  float: left;
  padding-right: 10px;
  padding-bottom: 10px;
}
To make it work, just put your 300×250 ad unit in a div with class single-left, and add the CSS above in your custom CSS window, and voila!
How to affiliate market and earn commissions on your theme
Last but not least, it’s important to make a big of blog income. When you make your first money blogging it’s exciting not only because you can cover the costs of your domain, hosting, and theme but also because you’ll soon realize that with many blogging revenue streams there is no limit. The more traffic you get, the more you can earn, and it can quickly surpass the income levels of a day job.
One great place to start as you make money with a blog is by affiliate marketing your theme.
At Theme Junkie, you get your own affiliate panel where you can setup a custom affiliate link to any theme, and track how many people you are referring. You’ll earn 50% commission on every sale you refer.

Combined with Adsense revenue (see video) and affiliate marketing revenue you can really make a blog that earns you some solid passive income. It definitely takes work, as everyone says, because ultimately you are trying to create a blog so compelling and awesome that people actually read it and click around (ad revenue) and will want to use the same look as you (theme affiliate marketing). It’s scary and fun and surprising and exciting, and we’re here to help you get through it all.
Parting words…you made it!
Well, we’ve made it to the end of the accompanying blog post guide. Whether you make a blog exactly like DearBlogger or just borrow a few of our strategies, I hope you learned lot about blogging and have a better outlook as you build a blog and find success out there.
Some parting ideas:
- I hope you use these skills to build better blogs on the web
- You can definitely beat those other blogs
- Always stay inspired
- Enjoy the little moments of blogging (every Tweet, Like, Share, Comment, etc)
If you enjoyed this blog post guide, please make sure to hit that Like button above and share it with a friend who you think might want to start a blog. Also, if you enjoyed the video I’d really appreciate a quick thumbs up! When you leave those little blue thumbs ups it helps the video reach exponentially more people and shows me we actually made something decent and didn’t totally miss your radar 🙂
Probably ranting: There’s so much fluff and copy-cat advice out there (if you don’t believe me just do a YouTUbe search for “make a blog” and see how many titles contain the words “step by step for beginners”, it’s ridiculous). I need your help now more than ever to beat it and keep everyone building better blogs.
In return for any show of your support I promise to be here every morning to answer you blog comments and pass off advice or observations so you never feel alone and always have an answer to your blogging questions.
Thanks for watching, off to a Greek island or something. I need to help Michelle start her travel blog, any ideas? Until next time!


Hi Greg
Thank you for sharing this article its really Out Standing and it is important to read this article before starting a blog……….Once again Thank you So much-Narayan
This post is a super fantastic guide for anyone seeking to understand the process of how to make a blog that works! So true what you say about “Starting a great blog is a lot like building a house.” There is a right and wrong way to build a house and the same is true for setting up and growing a blog. Utilizing this guide will ensure everyone gets it right from the start! I found your ‘Bye Bye Bounce Rate” eBook very helpful! 😀
Thank you for such a nice comment Cori. Yes exactly — if we build a house (make a blog) with care then every day living in it is more enjoyable.
I’ve never shared graphics of our plugins and TJ earnings either so that should be cool.
I hope people know that this guide explains how to create those sidebar images, been getting questions about those for years 🙂