As GoDaddy says “it all starts with a great domain name”.
But once you register a domain with GoDaddy it’s a whole another process to make a website on that domain name.
Fortunately, it’s not very hard at all and you don’t need a degree in computer science or anywhere close to get the job done.
This post will show you how to make a complete website with GoDaddy!
1. Register your domain name 2. register hosting (GoDaddy has good hosting, but we’ll use a recommended hosting specialist like HostGator) 3. then connect these two things, and 4. finally install WordPress and start blogging!
If you want to buy a GoDaddy domain name or already have one and want to build a website here are your best two options, based on advice from GoDaddy themselves (and the countless folks I’ve helped already).
Your two best options at this point are:
1. Use the GoDaddy Website Builder which starts at $5.99/month with a free 1 month trial. Included are a responsive website which you’ll set up, hosting and 24/7 support. This is a good option if you need a quick fix website and if you don’t want to control much on your site then this should be enough.
2. Create a WordPress Website. WordPress is free software and the web’s best content management system, used by Fortune 500 brands and personal bloggers alike. It’s WordPress.org we’re talking about here.
Now don’t get me wrong, the GoDaddy Website Builder is a great option. GoDaddy spent hundreds of thousands of dollars setting it up for us. It’s just that out of the 100 or so famous blogs I can think of in every niche….every single one of them uses WordPress instead.
Consider WordPress!
WordPress is the best option whether you’re a travel blogger, review blogger, mommy blogger, small business, eCommerce website or a million more things because the community is massive. If you go the WordPress route you could get GoDaddy WordPress hosting, but it’s not an ideal option and we can see why. We know this based on the limits GoDaddy places on memory and # of visitors you can get. Maybe GoDaddy figures you’ll get hosting with them because your domain name was registered with them, so they can charge and offer basically whatever they want. If this were the only way to create a WordPress website then this would be pretty good deal…
…But you don’t have to use GoDaddy for WordPress hosting and you can get a better deal.
The method I recommend if you go with option 2 (WordPress, which I use for all of my sites including this one) above is to choose a host that specializes in high quality, affordable hosting, like HostGator. There are a few other goods ones, but HostGator has been around the longest and consistently has the best customer service (live chat, people on the other end, etc). It’s how I recommend any beginner who is wondering how to start a blog, and we’ll see exactly how to do it below.
Costs?
Website builder is $5.99/month which is more expensive than using WordPress. However using WordPress isn’t free – any good website has to be hosted somewhere and it’s the hosting space (kind of like a plot of land where you’ll build your amazing new online home) that costs us a small amount of money. For example I pay about $10/month, but run a dedicated hosting server and host about 50 websites. When I started I chose HostGator’s Hatchling plan then upgraded later on when I was earning enough income online.
Let’s do a pricing comparison of the most basic hosting plans at GoDaddy and HostGator where you can install WordPress and create a fully functional blog:
GoDaddy Economy Hosting using GoDaddy’s current promotional coupons:
- 12 Months: $4.99/month
- 36 Months: $3.99/month
- 1 website
- 10 GB storage
- 25,000 monthly visitors
- Blog
- FREE domain with annual plan
- FREE Office 365 Business Email – 1st year
HostGator Hatchling Plan using our coupon ‘BIGBONUS’:
- 12 Months: $4.48/month
- 36 Months: $2.99/month
- EASY Control Panel (Try Demo)
- 1-CLICK Script Installs
- $100 Google AdWords Offer
- $100 Yahoo!/Bing Credit
- 4,500 Free Website Templates
- 99.9% Uptime Guarantee
- 45 Day Money Back Guarantee
- 24/7/365 Technical Support
So while GoDaddy offers some decent features, HostGator out does them big time in the hosting arena.
HostGator is the best place to create a WordPress website using your GoDaddy domain!
More features for less, and they only focus on hosting while GoDaddy focuses on domains. The only area where GoDaddy excels is with the free domain name. However while it is nice if you don’t have one yet, offering a free domain name is basically only a cheap ploy to get the hosting customers. Based on experience it’s really not worth living with below average quality hosting. You can always get a discounted domain name for $5.99 from HostGator.
So at this point we’ve narrowed down the steps you need to take!
Given you a. want to use WordPress like massive brands and famous writiers, bloggers etc and b. you want the best hosting space with the best deal…it’s time to learn how to setup a self-hosted WordPress.org blog at HostGator!
Start to finish process with visuals!
So here’s how to do it!
First step is register the hosting
Remember, this step is easy and fun. It will set you up for a great website on the best hosting available to us newcomers. Take a deep breath, grab a coffee and settle in because unlike the above quick read this part will take you about 30 minutes to 1 hour given you’ll probably want to carefully navigate through every step.
Let’s begin!
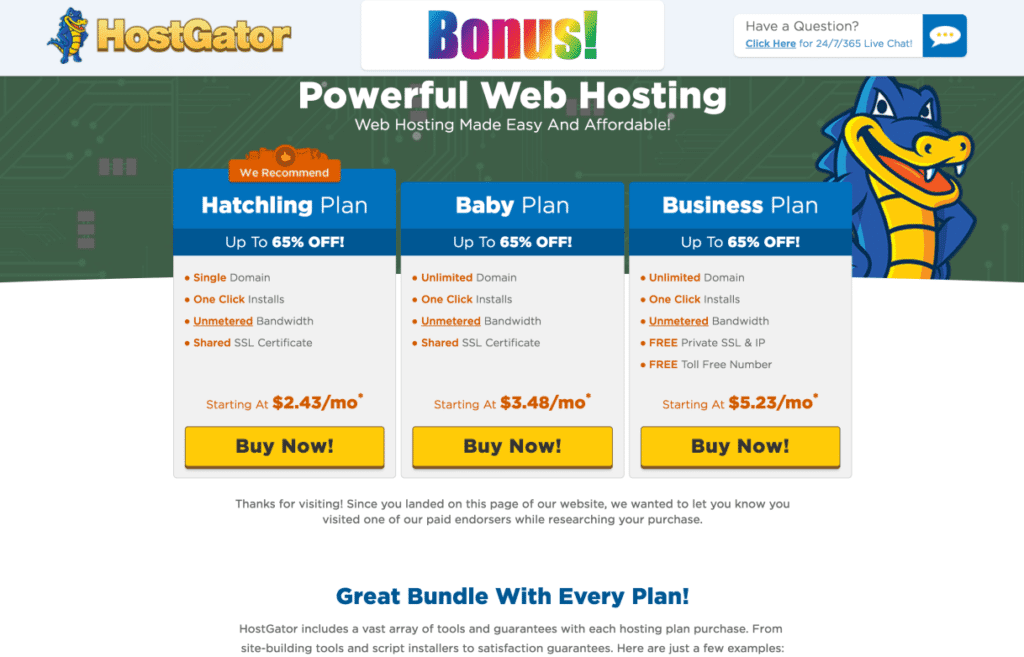
Head over to http://www.hostgator.com/greg to get increased discounts on the Hatchling or Baby plans, which are the best options and the most common choices for your first blog or website.
You’ll see the “Bonus!” logo at the top – you’re in the right place.
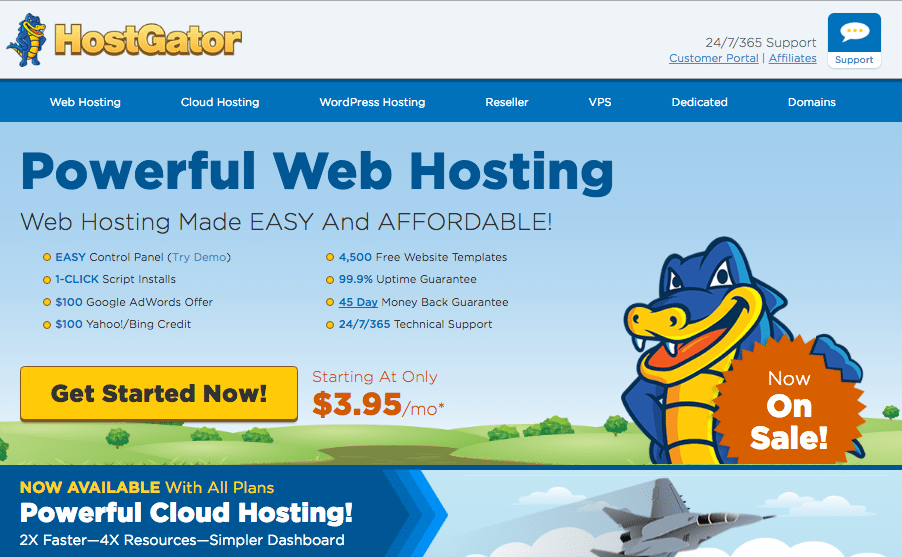
If you’d rather not go through our affiliate link that’s fine! Just visit hostgator.com and click on Web Hosting in the upper left and you’ll get to the same page as our link above.
Then follow the exact same process below. But the affiliate link guarantees you get the better discount described in detail below…so you should know about it!
Next, select your plan. The “Hatchling Plan” is what I recommend for beginners. It’s where I started way back and you can always upgrade later on.
Click Buy Now!
Note: If your website is part of your business, you can write off 100% of web-hosting and domain name costs in your annual taxes.
Now we are in the HostGator Order Form. There are 6 simple steps to register hosting which we’ll walk through now.
1. Choose a Domain
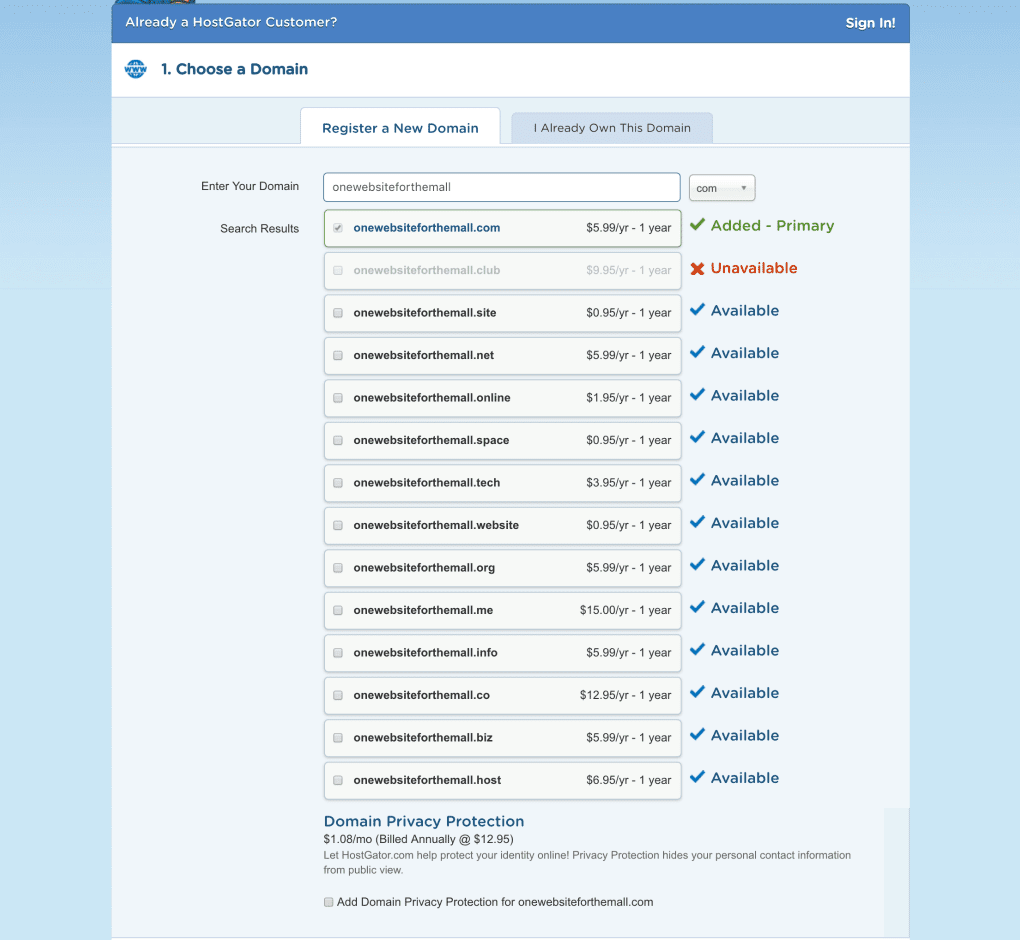
You can register a new domain name for $5.99/year or click I Already Own This Domain name and then pay HostGator nothing for your domain name. To do this you must have already registered a domain name at GoDaddy or another registrar.
If someone already has the domain name you selected, you’ll get an error message. It’s okay, try again. No harm done.
Once you have successfully entered your domain name, scroll down an uncheck Domain Privacy Protection because it’s an unnecessary cost.
Step 1 is done.
2. Choose a Hosting Plan

Make sure you select Hatchling for 12 months. Next, enter a Username and Security Pin. These will log you into HostGator’s billing portal should you need to later on.
Done.
3. Enter Your Billing Info
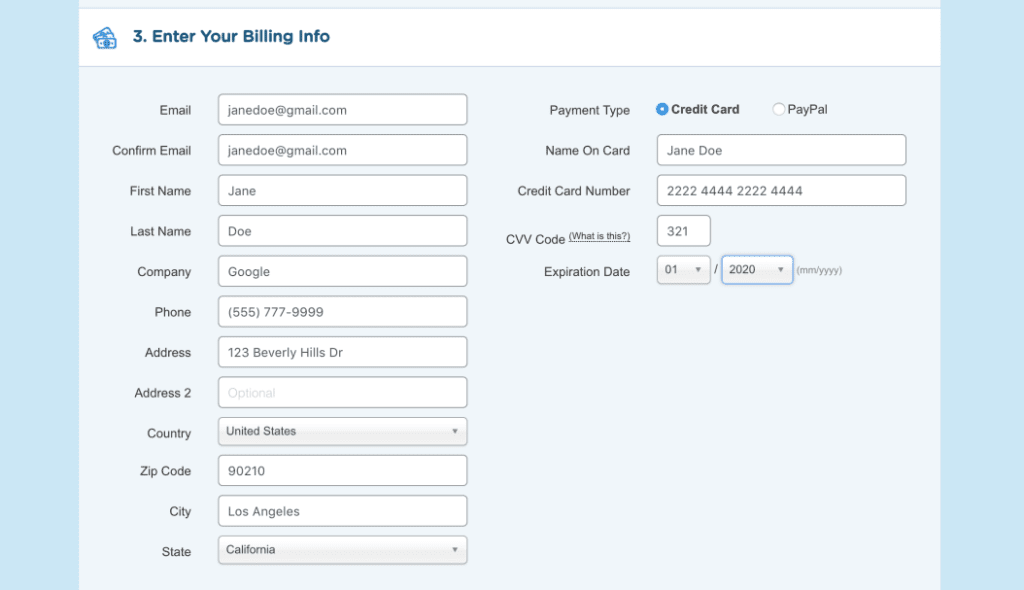
Just like any purchase from Amazon, eBay, Apple, Netflix, or wherever you like shopping online.
Done.
4. Add Additional Services
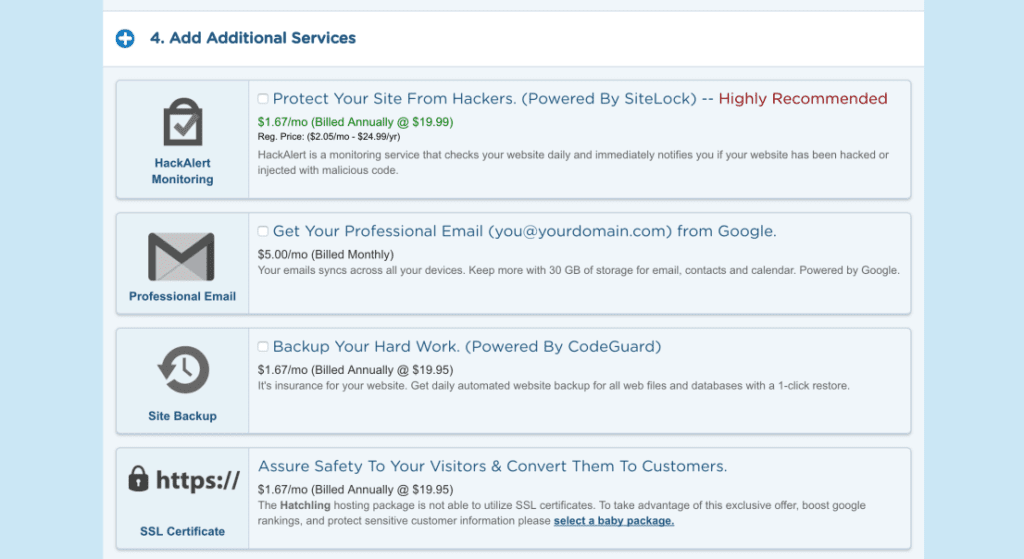
Or rather, not. Uncheck everything here and move on.
5. Enter a Coupon Code
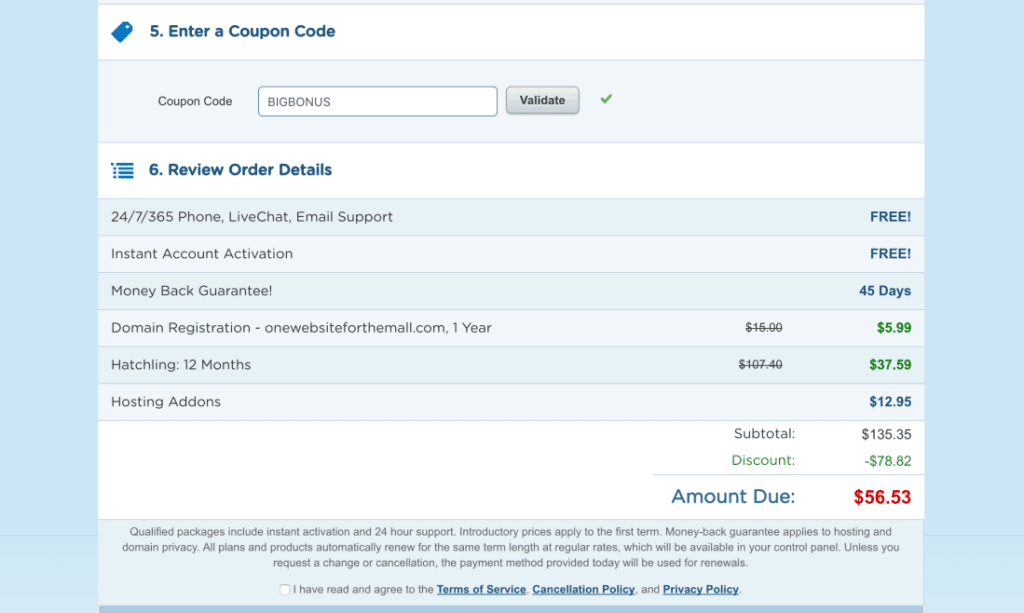
Make sure to enter the coupon code ‘BIGBONUS’ to get an increased discount. HostGator offers a regular promotional coupon of 20-33% off but my coupon will save you on average 50-65% off! I check regularly with HostGator to see if there are any seasonal offers. So if it’s available, you’ll hear about it here.
If the coupon ‘BIGBONUS’ is already entered, you’re all set.
Using the coupons come at no additional cost to you and also gives us credit for referring you which allows me to keep making more free tutorials so I really appreciate if you use this coupon. Thanks!
Done and done.
6. Review Order Details
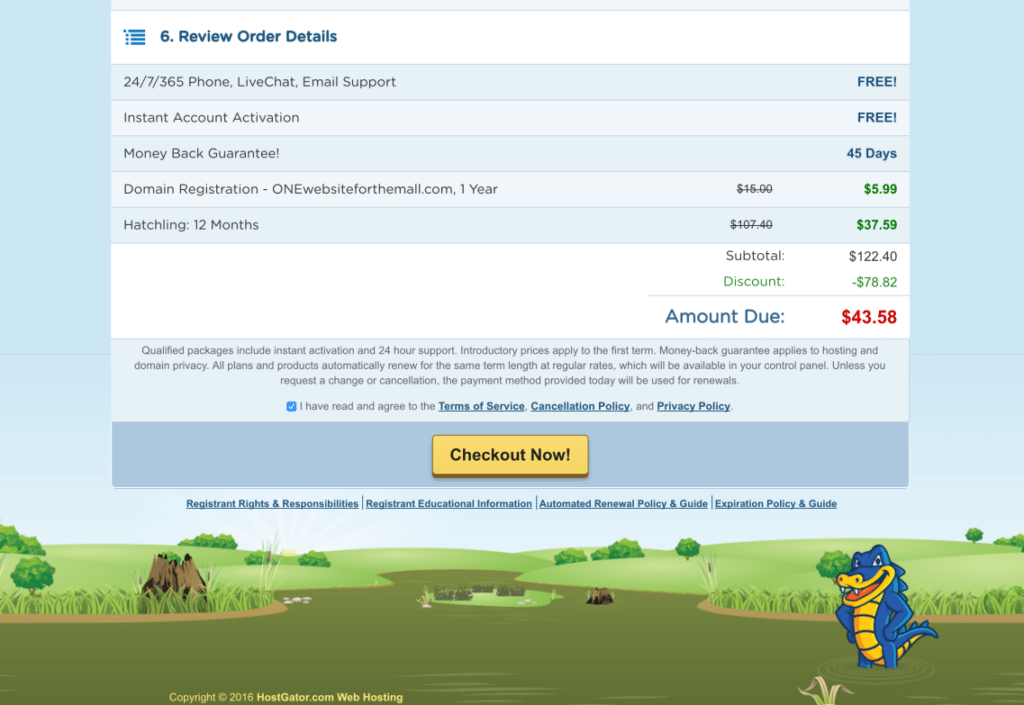
Make sure you have no Hosting Addons. In this screenshot we have a domain name for $5.99 and hosting for $37.59, perfect. These two numbers combine to make the red number of $43.58, which is a great deal. Your numbers may vary slightly, let me know any questions in the comments.
Once you’re happy with your order details, check the box for I have read… and then click Checkout Now.
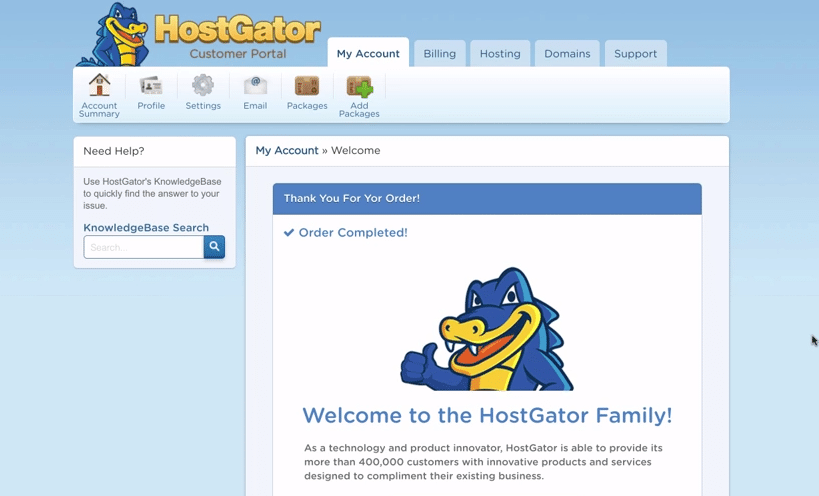
You’ll get a screen like this one welcoming you to the HostGator family (nice!) and it’s now time to check your email to continue.

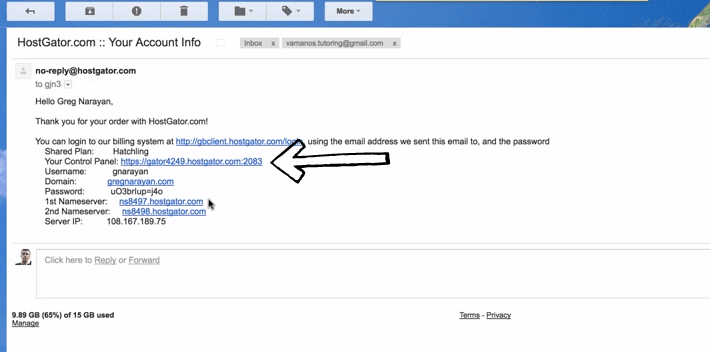
In your inbox, after a couple minutes, you’ll see two emails from HostGator. Open up the one titled HostGator.com Your Account Info.
Now we need to change your nameservers, which connects your hosting and domain name
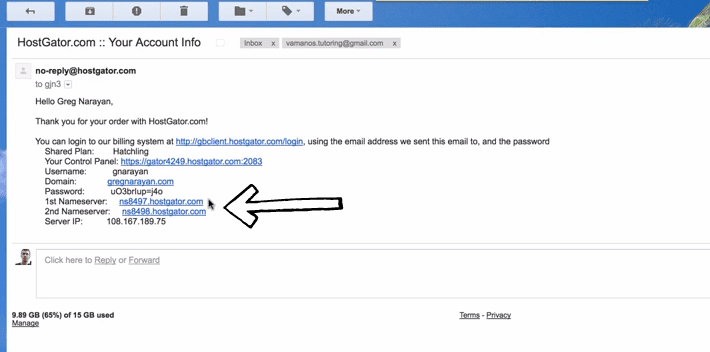
This is just a sample from a previous blog I made, but your email will look just like this one. You now want to write down your Nameserver 1 and Nameserver 2. We’ll use these to connect your domain to your hosting.
If you bought both domain and hosting from HostGator, we’ll need to connect your domain to your hosting now. It’s very easy and I’ll show you how now. If you visit your new site, you’ll see something like this.
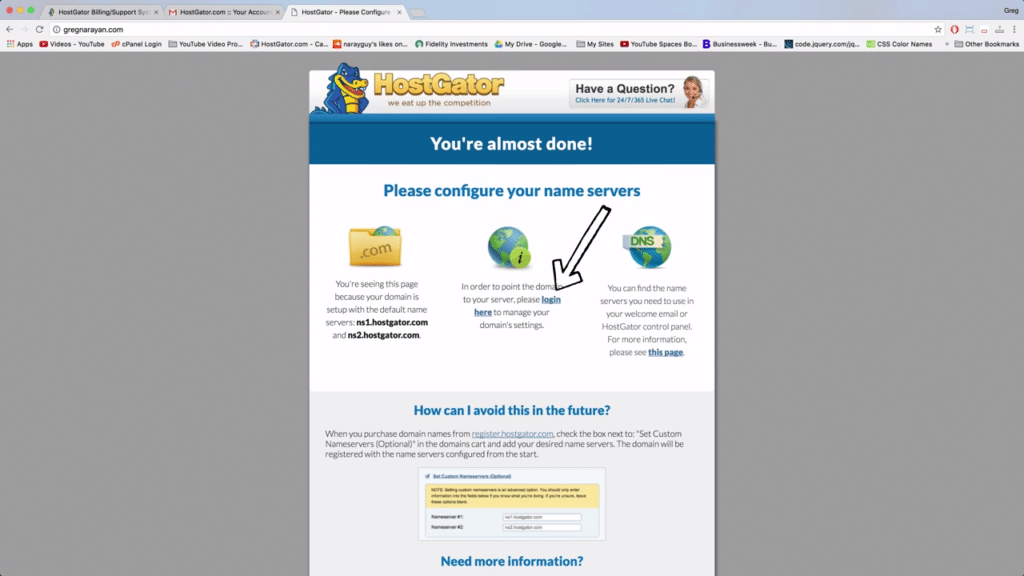
Click on right where the arrow points to get to the HostGator Billing Portal.
You’ll need some info from your emails to login.
Back in your inbox, open up the second email from HostGator titled Thank you for choosing HostGator! Use the Login name and Password in this email to login to your Billing Portal.
Once in the Billing Portal, click on the Domains tab, then click on the gear icon beside your domain name.
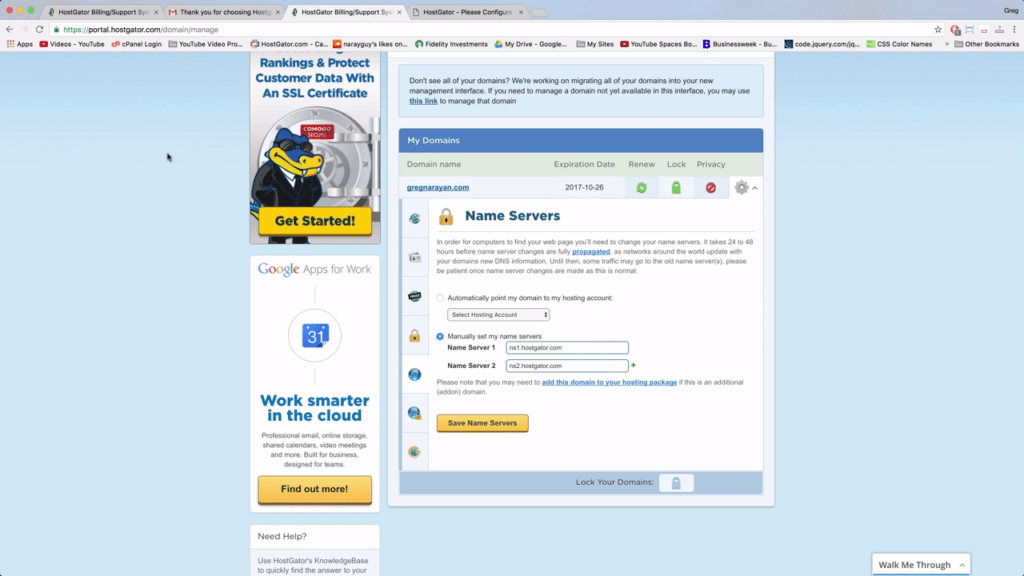
You will see this screen above, and it’s time to enter those Nameservers from the first HostGator email. Then save them. After a couple more moments, you’ll see this screen on your site.
This means it’s time to begin installing WordPress! Great job so far!
Finally, we can install WordPress.org
Note: If you bought your domain name elsewhere, for example at GoDaddy, you need to enter your HostGator nameservers over there now before proceeding.
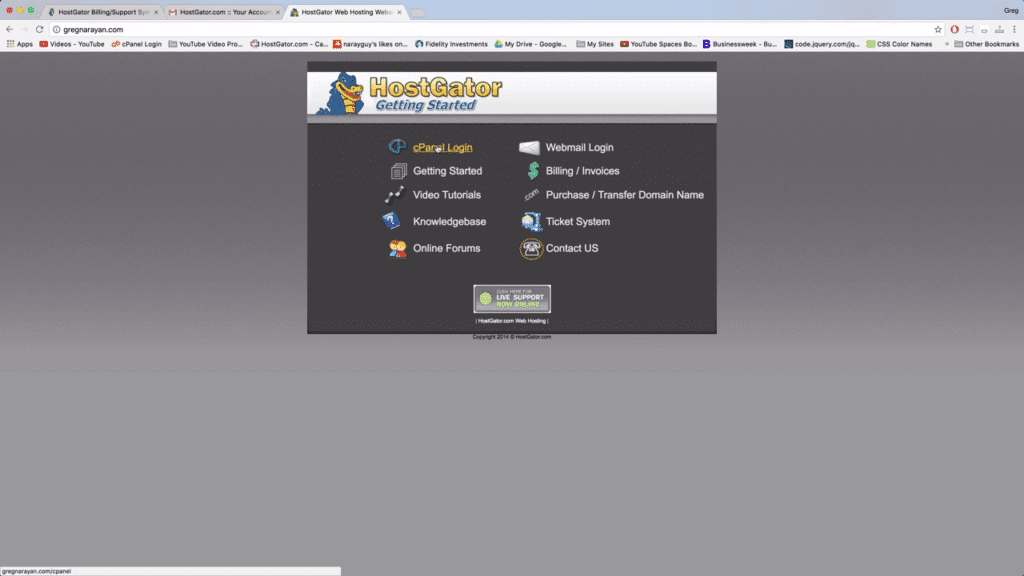
Head back to the email titled HostGator.com Your Account Info and click on the link called Your Control Panel.
Clicking on the Control Panel Link will take you to the screen right below. Login to cPanel using the Username and Password from your Your Account Info email.
Note: Got any questions so far? Drop a comment or consult the live chat feature at HostGator.
So you’re now inside the brand new HostGator cPanel called Paper Lantern! Beautiful, isn’t it? I think so, I’ve seen several generations of cPanel!
Ok, enough reminiscing, let’s move forward.
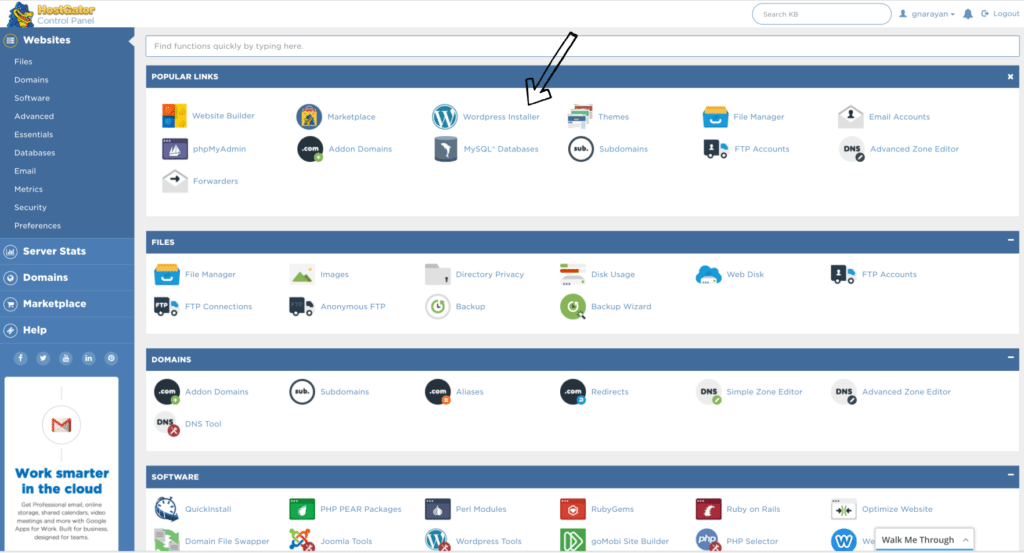
Click on the link at the top that says WordPress Installer.
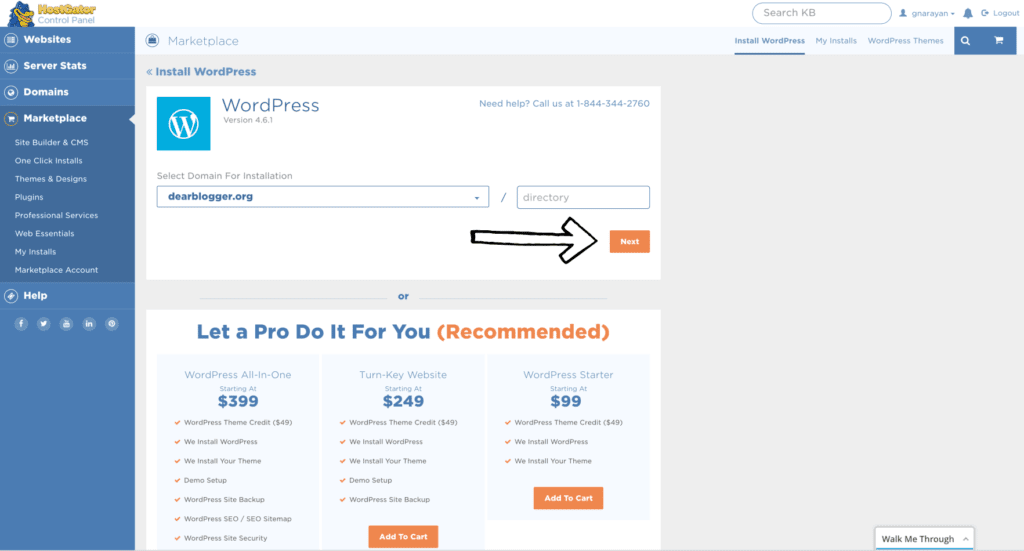
Choose your domain name from the drop down list, then leave the white box to the right of it blank. Click Next.
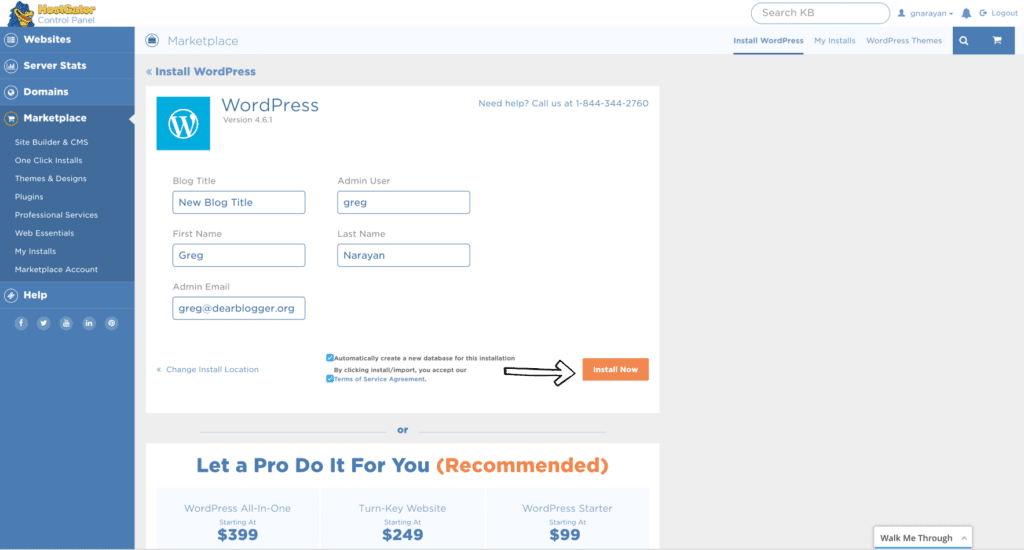
Next, enter in some basic blog info. You can change most of this later, but make sure to get your email correct and pick a good username – this will be your new WordPress username!
Make sure your screen looks exactly like mine above (except with your own information) then click Install Now.
Great job! You’ve just installed your own copy of WordPress for free and it’s the same thing the pros use.
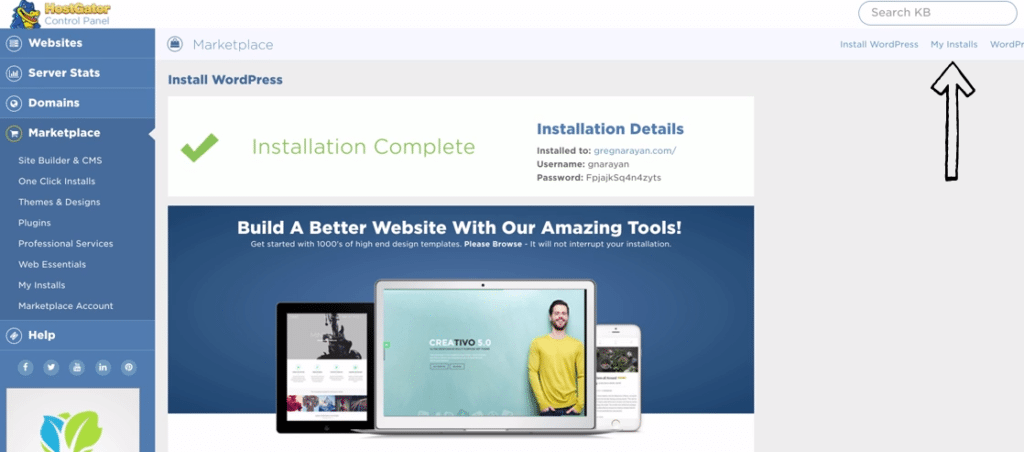
You can go celebrate now if you’d like for about 15 minutes. Then come back and click the link in the upper right that says My Installs.
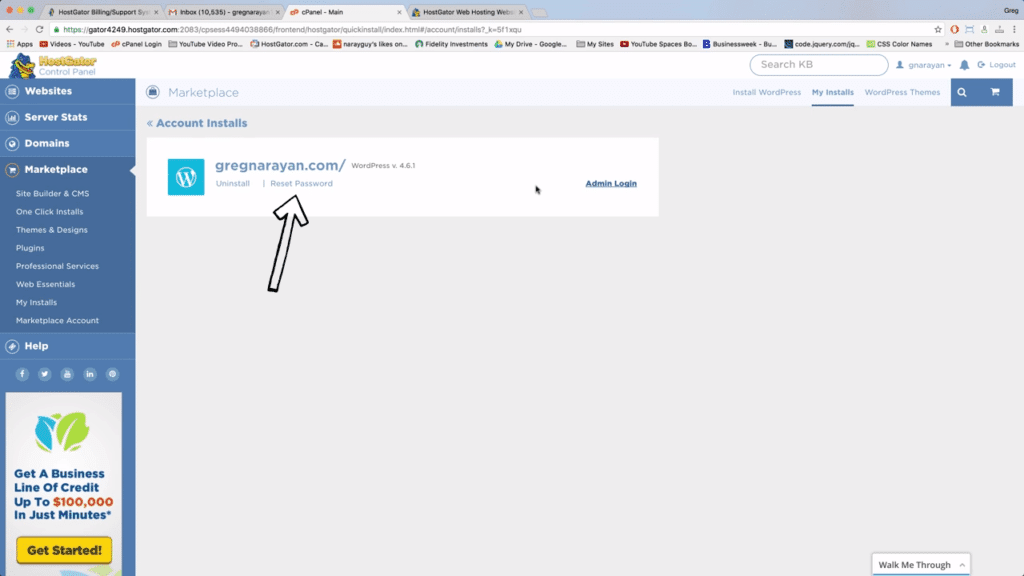
Change your WordPress password. Save.

Now click on the link that says Admin Login.
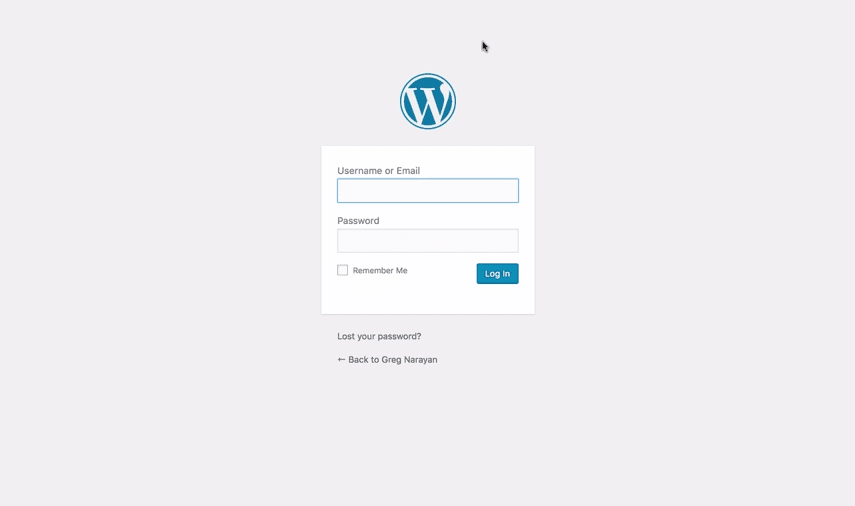
Clicking on that link will take you to your WordPress login screen which you’ll get quite familiar with over time.
Bookmark your login link (which is always http://www.yourdomain.com/wp-admin) now before you forget it. I prefer having it on the browser bookmark tabs, but up to you.
Login to WordPress for the first time using your new password you just made, and your Username.
Welcome to WordPress! You did it!
The sky is the limit now, really. You now run a blog on the web’s most powerful CMS, so go have some fun with it!
For the comments – did you find any step above particularly difficult? Would you like to add a step or maybe some advice to the guide for the next new budding website creator? Let us know by posting a quick comment! Thanks!
p.s. As usual I’ll be adding more to this tutorial as we think of ways to make it better, but it’s ready to use right now!


I am trying to launch a static website to provide information to hobbyists of a specific brand of Model Trains.
I have never set up a web site before.
I have a FREE Domain Name that I purchased along with web hosting from Godaddy.
From there I stumbled onto PLESK and then stumbled on to WORDPRESS.
I had an issue with something on Godaddy and when I spoke to a rep, It was recommend that I get an SSL or viewers would be reluctant to visit my site.
I purchased an SSL from Godaddy.
I was able to build my site on WORDPRESS thru PLESK, which I can visit externally using Google Search, but I cannot access the site from another computer or phone.
It’s been six days since I started the process and I have NO VISIBLE WEB SITE.
Any suggestions? How would I transfer everything to your recommended HostGator?
Godaddy makes everything sound like a walk in the park, but does not explain all the extras you need $$$$$$$$$$$$$$$.
Thank you, Alan
Hey Alan,
Sounds like GoDaddy. But you haven’t done anything wrong. If you export the wordpress site, you can simply import into a new wordpress installation. And if you bought your domain at GoDaddy like I often do, you can definitely connect it to hostgator hosting by changing the nameservers. So your steps would be:
1. Get hostgator hosting
2. Install wp at hg
3. Export original wp site you can see somewhere
4. Point godaddy domain at hg using hg nameservers you get upon signup
5. Import wp content from old site into new fresh site
6. Hopefully blog and create content on your static site without problemos!
Let me know progress and further questions, alright? Cheers!
Greg
Hello,
I read your “How To Make a WordPress Website with GoDaddy – 2017” post. This post is very helpful for WordPress beginners. You described step by step how we make WordPress website with godaddy. Please keep writing similar blogs.
Thak you!!!
No problem Katina! Were you able to watch our GoDaddy 2019 WordPress video? BTW we also have a Start a Blog tutorial with an Amazon Giftcard Giveaway you should enter here! You can pretty easily win a $$$ for Amazon if you enter!
https://www.youtube.com/watch?v=8XsO5U17BY8